A late night system crash is no time to discover your strategy for Linux bare metal backups is flawed. The term bare metal recovery refers to the complete recovery of a system (boot loader, all partitions, OS and data) to new hardware. If the recovery configuration is not cd'd through properly, you end up rebuilding from scratch. Without a tested recovery plan, you risk hours of downtime and may even lose critical data that cannot be reconstructed from memory or documentation.
You have a good number of useful tools at your disposal for this type of backup.
In this guide we cover the various methods of bare metal Linux backup and how to create recovery media, and then walk through a full system restore from backup to bare hardware.
Blog contents
We will also cover the storage of your backup files (local, network, offsite) and how they integrate with your dedicated servers, using your Netrouting dedicated servers in a reliable and geographically distributed backup setup. We start with the basics: what exactly does a complete system image backup, and why would you do that?
What Is Linux Bare Metal Recovery and Why Does It Matter?
A Linux bare metal backup contains everything that is required to get a server up and running again: the Operating System, bootloader, disk partitions, installed packages and data. In contrast to file-level backups with tools like rsync or tar a full image of a server allows you to fully restore a server to exact same state on new hardware or after a replacement.
Why It Matters for Disaster Recovery
File-level backups are no good in case of hardware failure, ransomware or even accidentally deleting a partition, since you need a working OS to restore from the backup. However, bare metal recovery allows you to make a complete system backup and even run it from another location or even from a cloud server. In Windows environments this works similarly, but Linux servers need some special care with bootloaders and partitioning to make sure everything lines up correctly.
How Do You Back Up a Bare Metal Server?
- Boot from a recovery environment (e.g. a live Linux image or a specialized imaging program). That way no files are locked by the running OS.
- Capture a full disk image. Image all partitions on the disk, including the EFI or BIOS boot partition. The most common error with bare metal restore attempts is to skip the bootloader.
- Store the image off-host. That means you write to a network location, like a networked file system, or even a remote location like Amazon S3. An on-disk backup is worthless if the disk fails.
Note: Test bare metal recovery on a spare or virtual machine before you need it in production. An untested image is not a recovery plan.
Disaster Recovery Verification
Boot the restored system from the gold environment and make sure all services started up properly. Also verify the UUID of all partitions and the name of all network interfaces, as these can change on different hardware and can cause Linux init scripts to fail silently. It is essential to acknowledge any discrepancies in hardware identifiers early, as mismatched UUIDs or interface names can prevent critical services from binding correctly.
Understanding how each of the tools above complete a full system snapshot and also complete a full system restore is also key to fully grasping the above process definition. For more context, see Bare-metal restore .
How Linux Bare Metal Recovery and Backup Works
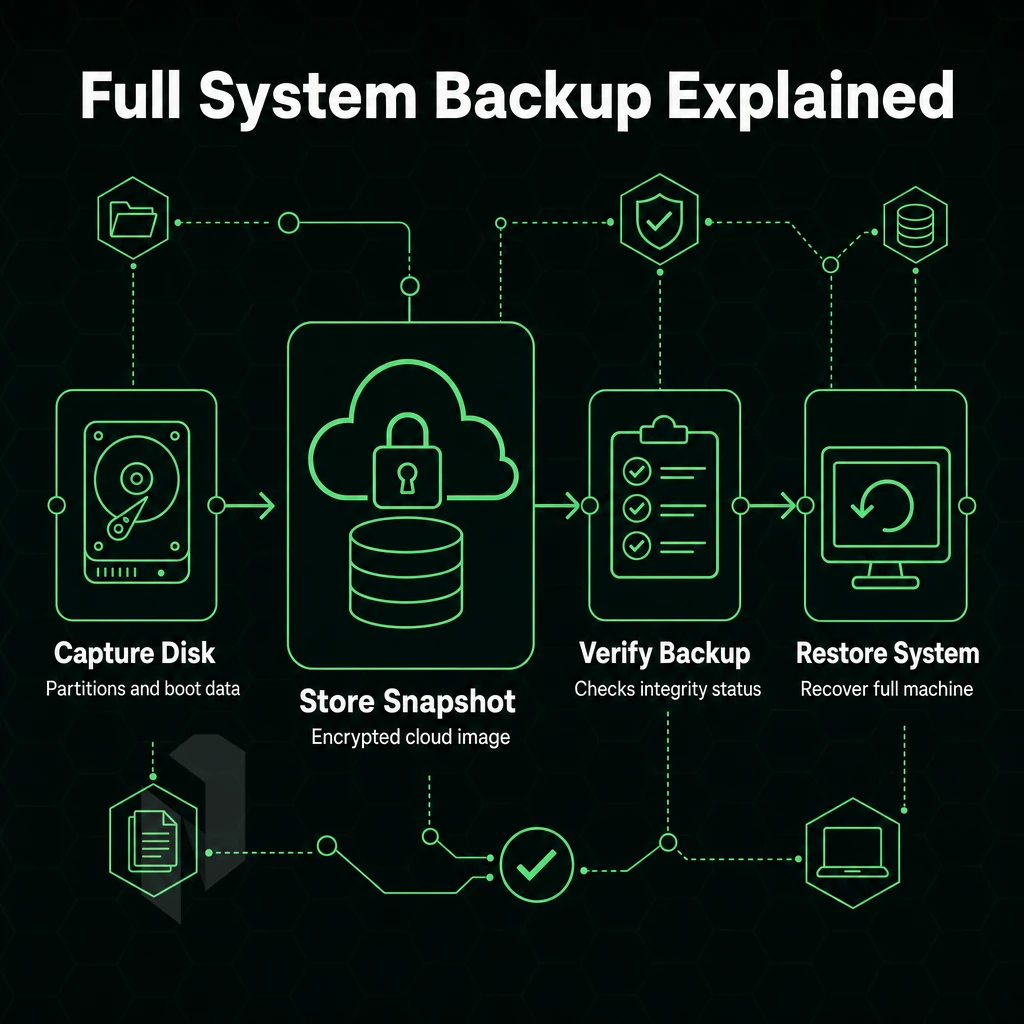
A Linux bare metal backup contains all the information to fully restore a server, such as the partition table, file system setup and boot loader configuration. The methods to perform a Linux system image backup can be divided into two categories: block-level imaging and file-level restore and boot loader re-configuration.
Modern file systems like ext4, XFS, and btrfs each require specific handling during image creation to preserve attributes such as snapshots, extended attributes, and subvolume structures. Each backup method has clearly defined steps for capturing system state, and the choice between them depends on your recovery objectives and infrastructure complexity. Organizations planning deployments in mar or other seasonal windows should validate their chosen method against representative hardware before committing to production rollouts.
Phase 1: Capture the Disaster Recovery Image
- Choose your method. Block-level tools like
ddor Clonezilla copy every sector of the disk into a single image. File-based frameworks like ReaR pair with rsync or Bareos to archive files and rebuild the bootloader separately. Block-level is simpler; file-based is more flexible for dissimilar-hardware restores. - Record partition and bootloader state. Capture the partition table, MBR or UEFI layout, and filesystem UUIDs. ReaR does this automatically. With
dd, document the layout manually beforehand. Note: skipping this step makes restoring to a different machine unreliable.
Phase 2: Store the Image Files Remotely
- Push to a remote target. This can be a NAS, a remote SSH host or even a USB drive. The remote target should always be kept on a destination separate from the source host. Storing a backup only on local storage is not sufficient, as it might be lost in case of host failure.
- Verify integrity. Checksum the image immediately after transfer. A corrupt image discovered at restore time is worse than no image at all. ReaR includes built-in verification;
ddusers should runmd5summanually.
Phase 3: Disaster Recovery Restore
- Recover the system from outside of the failing system. Boot a recovery environment from a ReaR-generated ISO, or from a Clonezilla live USB, or even PXE-boot a rescue image.
- Reconstruct the image on disk. Play back the stored image. Block-level restore is fast, but typically hardware dependent, meaning close source hardware is generally required. File-level restore using ReaR support for dissimilar hardware offers more flexibility.
What Is the Best Backup Tool for Linux?
ReaR is the strongest all-around choice for Linux bare metal recovery. It handles both Windows-adjacent mixed environments and pure Linux fleets, generates a bootable rescue ISO, and integrates with backup agents like Bareos. For simpler single-disk scenarios, dd or Clonezilla cover the need without additional configuration. The next section breaks down each of these tools for creating recovery images in detail so you can match the right one to your environment.
Step-by-Step: Bare Metal Backup with ReaR
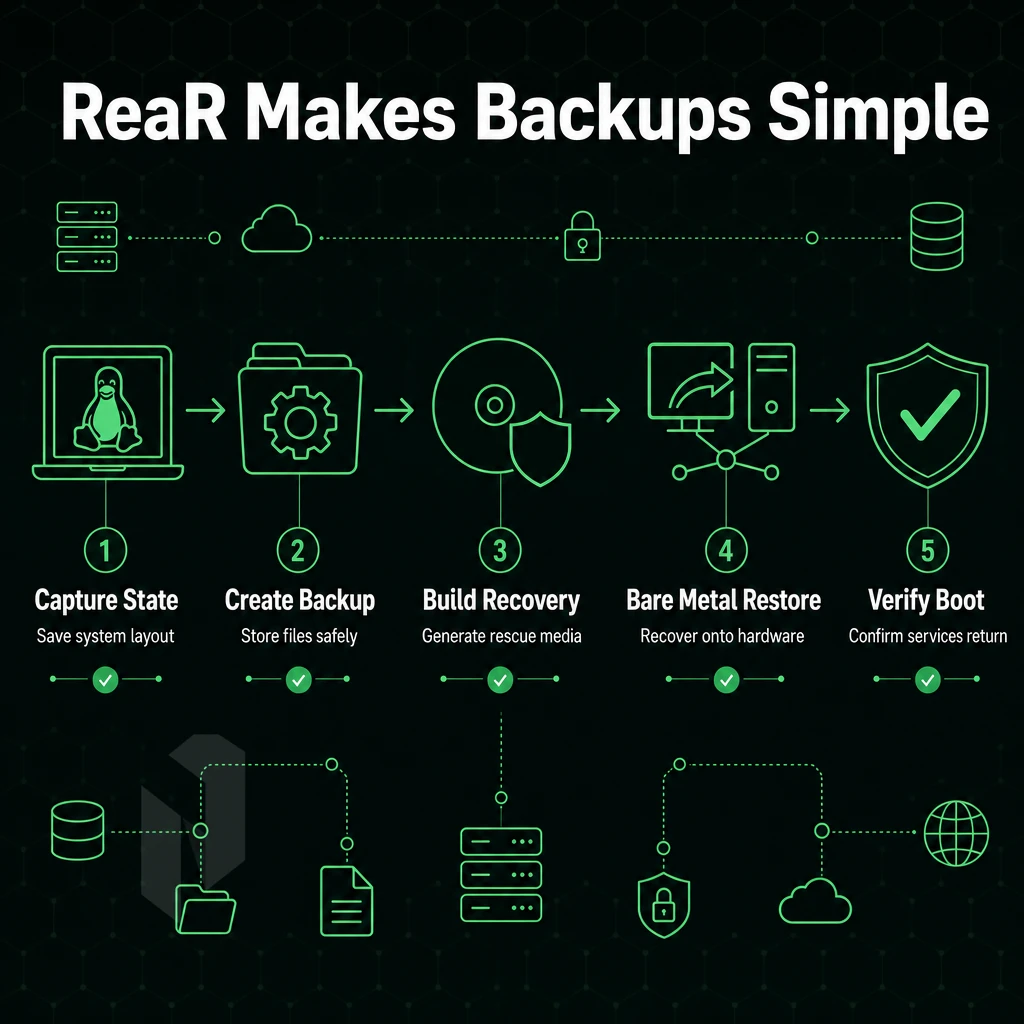
Relax-and-Recover (ReaR) is a Linux disaster recovery framework.
Install and Configure Relax and Recover
On Debian/Ubuntu, run apt install rear. On RHEL or Rocky, use dnf install rear. Once installed, open /etc/rear/local.conf to configure your output and system image method. For centos systems, the same dnf command applies since the package is available in the EPEL repository. The rear package is maintained in the official repositories for most major distributions, making debian and Ubuntu installations straightforward without requiring third-party sources.
The configuration file uses a simple key-value syntax, with each directive controlling a specific aspect of the backup process, and most settings remain at their default values unless explicitly overridden. You can manually review and edit the directives to match your storage topology, adjusting paths and retention policies as needed. For systems running on older CentOS 7 releases prior to jul 2020, you may need to enable the EPEL repository manually before the rear package becomes visible to dnf.
To create a minimal NFS-based configuration, it looks like this:
OUTPUT=ISO
BACKUP=NETFS
BACKUP_URL="nfs://192.168.1.100/backups"
To target a USB device instead, set OUTPUT=USB and point BACKUP_URL at the usb device path. ReaR supports both destinations natively.
Generate the Rescue Image for Critical Systems
Run rear mkbackup as root.
Booting the ISO on replacement hardware launches an interactive recovery shell that pulls the archive and restores the full system. The recovery shell automatically detects available storage devices on the target machine and presents them for selection during the restore workflow.
What Is the 3-2-1 Backup Rule for Business Continuity?
ReaR's use matches the 3-2-1 backup rule: 3 copies of data, on 2 types of media, with one copy offsite.
Netrouting has 10 locations in Europe, North America and Asia. This makes it easy to store off-site replica copies in a location of your choice, without having to manage remote servers.
Now that we have a verified offsite image, the challenge is gaining clean access to a full recovery.
Bare Metal Restore: Recovering Your Linux Server
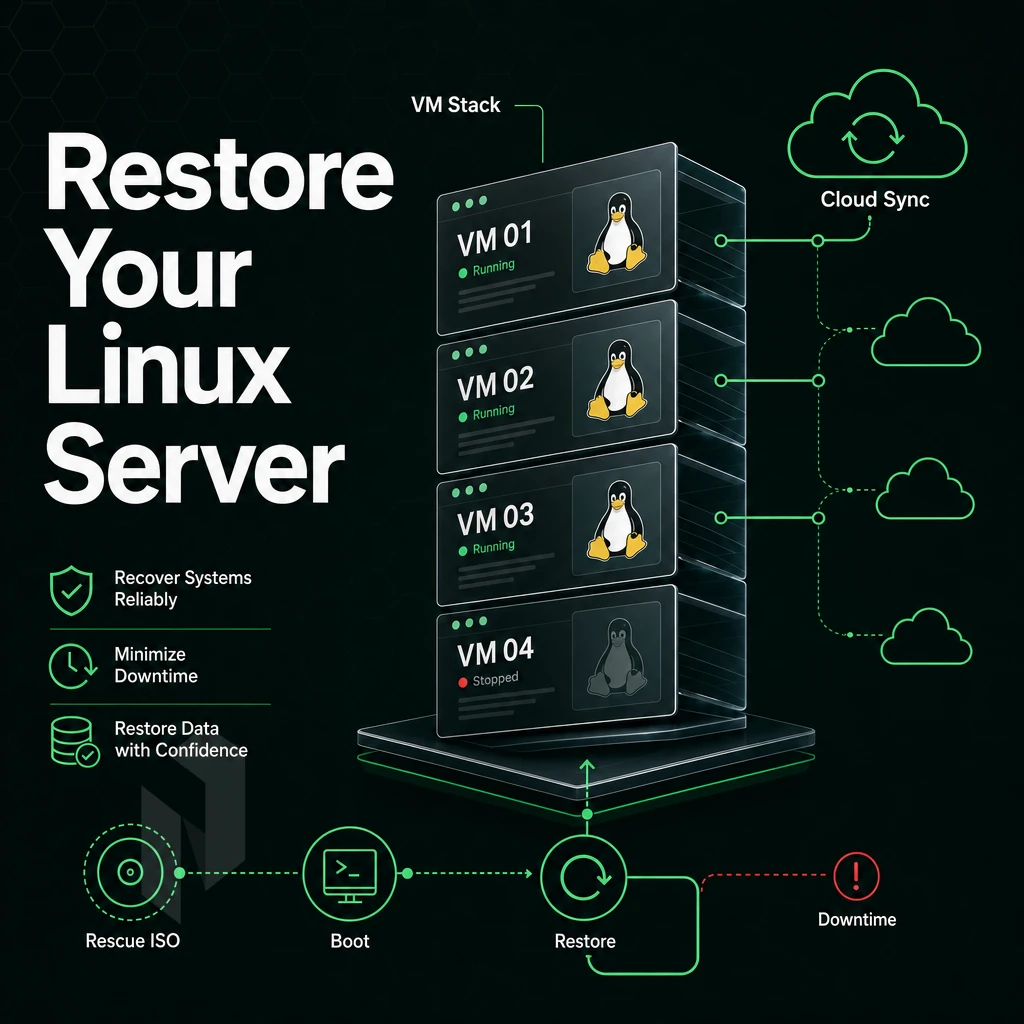
When disaster strikes, ReaR turns your redundant copy into a bootable rescue environment. initialize the ISO via USB, PXE, or IPMI virtual media, run rear recover, and the recovery process handles the rest, repartitioning the disk, restoring files, and rebuilding the bootloader automatically. Once the restore completes, you can reboot the system directly into the recovered environment without additional manual intervention.
How to Install Linux and Restore the Server Process
ReaR recreates the partition layout from the stored recovery images, and then writes the backups back to the new disk. The restore process is fully automated and is driven by a single command. Using relax and recover, it creates a bootable system from the partition table on up.
Dissimilar Hardware Disaster Recovery
ReaR software maps driver configurations at launch time. Unlike block level recovery, this hardware based recovery method allows you to replace a failed node with completely different storage controllers and mesh interfaces, and recovery will most likely work.
Test Before You Need It
Remember to always test your relax and recover process in your staging environment first. A disaster recovery process with an untested configuration is a liability, not a safety net. Our IPMI-enabled bare metal servers can easily be setup as an isolated test dedicated host to test your backups and verify the restore of your files. A reliable bare metal recovery procedure also depends on your physical node and fabric infrastructure.
Why Your Bare Metal Backup Strategy Starts with the Server
A bare metal failover copy is only as reliable as the hardware and infrastructure path behind it. Our dedicated bare metal servers give you full control over the recovery process, no hypervisor restrictions, no shared-tenant noise.
- Out-of-band access via IPMI/iDRAC: Ability to mount recovery media remotely without physical presence.
- Unmetered bandwidth, large data copy transfers to remote targets without cost friction.
- Always-on DDoS protection, our system continues to send all traffic (including new traffic) while under attack, as a full copy.
- Global reach, our infrastructure is located in Amsterdam, Frankfurt, Miami, New York, Hong Kong and Singapore and can be used as geographically distributed recovery targets.
- 24/7 NOC, our proactive monitoring service supports your business continuity around the clock.
Start a conversation with our team about finding the right compute node and location for your Linux bare metal recovery needs. In the meantime, review the following checklist to ensure your current mirror solution is meeting 100% of your needs, especially for critical systems.
Disaster Recovery Quick Checklist
Linux Bare Metal Backup: Quick-Reference Checklist
Rehearse the following steps before every data mirror cycle to keep your Linux bare metal recovery plan up to date and production-ready.
- Set your Recovery Time Objective (RTO) and Recovery Point Objective (RPO) before picking a tool or schedule.
- Install and configure ReaR with the correct
BACKUPandOUTPUTvariables for your storage target. - The full disk layout (partition tables, LVM information, etc. and filesystem UUIDs) should be captured in a snapshot as part of the regular backups.
- Store the bootable rescue ISO and system snapshot archive in different locations, i.e. one locally and one off-site or remote.
- Verify the integrity of your backups every time you run them by checking the ReaR log and checking the checksums of the archive(s) created.
- Perform a full test of a bare metal restore in an isolated test environment at least on a quarterly basis. Never assume a recovery snapshot actually works until you have completed a full restore from the disk snapshot.
- Automate scheduled backups via
cronor a systemd timer and alert on any non-zero exit codes. - Document the full restore process (i.e. how to get to the power on media, the grid configuration, and what storage target to restore to) so that any engineer can complete the restore in a timely fashion.
Linux bare metal volume snapshot is not optional for production servers, it’s the only way to guarantee that a disaster can be recovered quickly. A combination of a reliable image target and the tested bootable rescue image created with ReaR will get your system up and running on the appropriate bare hardware in minutes, not days. The verify of a restore is just as important as the validate of a system clone, an untested image is not a disk clone.
Your drive clone strategy is only as strong as the bare metal recovery infrastructure underneath it. Netrouting's dedicated bare metal servers, provisioned in under 60 minutes, backed by a 2.4 Tbps+ topology and 99.9% uptime SLA. Give you a fast, reliable target for offsite recovery archive storage and a clean restore environment when you need it most. Explore Netrouting's dedicated server options and build a recovery plan that actually holds up under pressure.