
Control your own hardware to run an ARK Survival Ascended dedicated server: it’s a completely different ball game to renting a slot on a shared game host. For one, you have full control to configure to your heart’s content, to persist the world between sessions, to mod to your liking.
Additionally, and most importantly, your survival evolved beyond the constraints of underpowered shared servers that flood every budget server list yet are oversold to start with. The challenge is matching the right servers to the peculiar demands of the ARK: Survival Evolved game engine, lots of single-CPU core power, fast NVMe storage, and quick resolution of mod ids at runtime. Additionally, ultra-low latency networking is essential for any ark server, and that's before even thinking about increasing player numbers or stacking additional mods on top.
This guide explains how to set up and manage a production quality dedicated ARK Ascended server. Whether you are running a server of your own on bare metal for a small closed group of friends or managing a cluster of multiple servers for hundreds of players.
Blog contents
The decisions you make on the infrastructure level (server type, hosting, networking) will determine whether your ark server is up, running, and actually playable or not. In this guide we will explain what an ASA dedicated server is and how it differs from other types of servers to play ARK on.
ARK Ascended Dedicated Server Settings Explained
An ARK Survival Ascended dedicated server is a persistent, always-on game server instance which you can control in full. As opposed to session-based play on official servers or even just playing with friends in multi-player sessions. A dedicated server is always-on, and separate to your own client, giving you complete control over the full ARK Survival Ascended experience.
How It Differs from Official and Session-Based Servers
Official servers are shared servers that you can join. They are not customizable. Session-based servers are created only for the time that the host is running their own game client. A dedicated server is a 24/7 server running off of a single machine with no game client necessary.
Many players also join unofficial servers, which are privately hosted dedicated instances that offer custom rules and modifications not available on official infrastructure. Players on Xbox can also access the game through the windows store, which provides an alternative distribution platform with its own multiplayer ecosystem.
Dedicated servers in survival evolved games give you complete control over your own server list and personal servers, including player limits, difficulty, tame rates, and more. You control who can join your server, what rules apply, and when you want to restart your server.
Why Players Run Their Own
Reasons for setting up a private Survival Ascended mods server are mainly practical. First, official servers do not support loading of custom mods. Then, there is the issue of server wipes and max population limit on shared servers that annoy players so much.
Another advantage is that cross platform mods can be tested and deployed in a controlled environment before rolling them out to your player base. Enabling server crossplay also allows friends on different platforms to join the same world, expanding your potential player base significantly.
Key motivations include:
- Full mod support via server tools like SteamCMD.
- Custom rates, XP, harvesting, breeding timers.
- Whitelisted or invite-only player access.
- Persistent uptime regardless of player session state.
How much RAM does an ARK Survival Ascended dedicated server need?
Here’s where your own Ark server planning gets serious. Survival Ascended is a Unreal Engine 5 game which means server requirements have increased significantly from the UE4 days. For a small private server 16 GB RAM or more is required. A public server with players online and many mods will require 32 GB or more RAM to run smoothly.
A modern multi-core Windows PC is enough to run a small private instance, but for reliable public hosting a dedicated server setup with bare metal infrastructure and dedicated resources is far more practical. In this chapter we will explain how these requirements are translated into hardware.
Choosing the right dedicated server setup means balancing upfront hardware costs against long-term performance stability and player experience quality. Windows Server or a modern Linux distribution are both viable choices for the operating system, though Windows tends to offer simpler initial setup for administrators less familiar with command-line server management.
ARK Server Hardware Requirements for Survival Ascended
| Component | Minimum | Recommended |
|---|---|---|
| CPU | 4 cores (x86-64) | 8+ cores, high single-thread clock |
| RAM | 16 GB | 32 GB per server instance |
| Storage space | 60 GB SSD | 100 GB NVMe (world saves grow fast) |
| Bandwidth | 10 Mbps upload | 100 Mbps+ for 20+ concurrent players |
| Operating system | Windows Server 2019 / Ubuntu 22.04 LTS | Ubuntu 22.04 LTS (lower overhead) |
ARK Survival Ascended Architecture Overview
For Ark’s successor, each map is served by a dedicated, single-threaded Unreal Engine server process. Thus, one server instance = one map. Multiplying servers on the same host multiplies RAM and CPU requirements which must be planned for before deployment. When planning capacity, remember that running multiple maps on one server requires careful resource allocation since each instance operates independently without shared memory pools.
In Multiplayer games that use UDP, the players connect directly to the Public IP of the Server hosting the game. This means that if the Server is behind a NAT then the game needs to have port forwarding setup for that Server, and the necessary ports opened on the Server’s Firewall and the router. Ensure that all required UDP ports are correctly configured as open ports on both your firewall and router to allow incoming player connections without packet loss or timeout errors.
- UDP 7777, game application traffic.
- UDP 7778, raw UDP socket (game engine internal).
- TCP/UDP 27015, Steam query port.
- TCP 27020, RCON (optional, admin console).
Dynamic config changes, INI edits to GameUserSettings.ini and Game.ini, take effect on restart. There is no hot-reload. Build your config pipeline around that constraint from day one. Backing up your configuration alongside world save files ensures you can roll back cleanly if an edit causes instability or corruption during testing phases.
Quick Setup for Ark Survival Ascended
- Accept the end user license agreement and install SteamCMD. Use app ID
2430930to download the ARK: Ascended dedicated server binary. - Assign storage space to saves and mod caches for a world that continues to grow. Keep this separate from your OS volume. Set up a dedicated partition or volume for this.
- Configure your launch script. Set
-WinLiveMaxPlayers,-ServerPassword, and map name as command-line arguments. Keep the script in version control. - Open up the relevant ports on your firewalls (both host and upstream network ACLs).
- Verify the server running state. Query it with
steamcmd +app_info_update 1 +app_status 2430930or a Steam server browser before announcing to players.
ARK Survival Ascended Performance Tip
One of the biggest mistakes when setting up a survival evolved server list to play on is not allocating enough RAM when first planning out those servers. Remember that each server instance needs to have the full amount of RAM allocated to it, and none of it is shared between instances.
Using swap space kills performance instantly. So, first figure out how many ark server instances you plan on running, then figure out how much CPU power you will need, and finally how much RAM you will need.
Netrouting's bare metal dedicated servers are sized with up to 2 TB of RAM and unmetered 10 Gbps connectivity, making them a great option for survival ascended server hosting across large multi-map ARK clusters. Running an ark server cluster of this size would hit a memory ceiling on shared servers and most cloud-based VMs long before you could even get close to pulling it off.
First we need to transfer the server files to our local computer and start the initial configuration.
ASA Dedicated Server Setup: Server Files and Initial Setup
- CPU: 6+ cores (AMD EPYC or Intel Xeon recommended, ARK: Survival Ascended is single-thread heavy at spawn, multi-thread heavy under load).
- RAM: 16 GB minimum; 32 GB strongly recommended for populated servers.
- Storage: 60 GB NVMe SSD minimum for server software and world saves; HDD will bottleneck save operations.
- Bandwidth: 10 Mbps upload per 10 concurrent players; unmetered 1 Gbps eliminates headroom concerns entirely.
- OS: Windows Server 2019/2022 or Ubuntu 22.04 LTS.
ARK Survival Ascended Architecture Overview

ARK: Survival Ascended uses a dedicated server binary (separate from gaming client) to listen on two UDP ports for connections from players to the public IP of the server. There is no relay or matchmaking proxy so latency is purely a function of the path between your machine and the player.
Port forwarding requirements:
- UDP 7777, game traffic.
- UDP 7778, raw UDP socket (must be game port + 1).
- TCP/UDP 27015, Steam query port.
Open all three on your firewall and your router if you're behind a NAT. If you're running a bare-metal server with a public IP, then you'll only need to add rules to the host's firewall.
Quick Setup for Ark Survival Ascended
- Install SteamCMD and extract it to a directory of your choice. This is the standard tool used to install any Steam game for server use.
- Download the server software, run
steamcmd +login anonymous +app_update 2430930 validate +quitfrom the SteamCMD command line. This pulls the ARK: SA dedicated server binary into your target folder. - Create a launch bat file, in the same folder as
ArkAscendedServer.exe, create astart_server.batfile. Use it to pass all command line options cleanly: map name, session name, max players, and admin password. - Configure GameUserSettings.ini for rates, difficulty, and cluster ID rather than coding these into your batch file as flags.
- Verify connectivity, query your server via Steam's server browser or a tool like
gamedigbefore opening it to players.
Batch File Performance Tip
The most common configuration mistake is omitting -useallavailablecores from your command line options. Without it, the process scheduler ignores additional cores under peak load. Add it to your bat file launch string on day one.
Also avoid placing world saves on a spinning disk, as ARK: SA flushes saves frequently on any ark server, and HDD latency causes server-wide hitches that no amount of CPU headroom will fix. Test your launch configuration by executing the following command in PowerShell or CMD to verify all flags are parsed correctly before committing to production.
When running the server binary, the next layer of fine tuning the server's behavior comes from the launch parameters (flags & options) that affect the server from the very first connection on.
ARK Survival Ascended Command Line Options and Launch Parameters

Passing the correct parameters to a dedicated ARK: Survival Ascended server at launch depends on many settings like the ports, server name and passwords. All of these settings are passed as command line parameters to the server executable. For a complete list of all options see the ARK Official Wiki.
Core Launch Parameters for an ASA Dedicated Server
The standard command pattern looks like this:
ArkAscendedServer.exe TheIsland_WP?listen?SessionName=MyServer?ServerAdminPassword=secret?Port=7777?QueryPort=27015 -server -log
Parameters before the space are game options (appended with ?). Parameters after are command-line flags (prefixed with -). Key options:
- Port, game port, default 7777 (UDP).
- QueryPort, The Steam query port (default: 27015, UDP); controls whether the server is listed in server lists.
- RCONPort este consola de administrare la distanță, portul implicit este 27020 pe TCP.
- SessionName, sets the server name shown in-game.
- ServerAdminPassword, sets the admin password for elevated commands.
Automating Launch with a Batch File
On Windows, place the full command inside a .bat file in the server directory. Double-clicking it launches the process without a terminal window staying open. Add start /wait if you need the script to block until the server exits.
In order to connect to a game/ server etc. (incoming connections) port forwarding has to be enabled. Open up the Windows Firewall Inbound rules for the following ports: UDP 7777 (the game), UDP 27015 (Steam server query port), TCP 27020 (RCON port). By default the Outbound rules are rather open, but better check them anyway.
How Do You Add Mods to an ASA Server?
Append -mods=ModID1,ModID2 to the command line, using comma-separated Workshop IDs. The same server will download and load mods automatically on startup. Mod order matters, list them in the priority order you want them applied.
Running Multiple Servers and Avoiding Port Conflicts
Assigning different ports to different instances on the same server for different runs is required. That means you cannot start a second server on the same server with the same ports. Increment the port numbers by at least 2 for each set of ports (e.g. 7777/27015/27020 for instance 1 and 7779/27017/27022 for instance 2).
With your launch parameters sorted, we then move on to tweaking server behavior by tweaking your server configuration files to alter rates, access and game rules.
Measure the route. Not the distance on a map.
Use the Netrouting Looking Glass to run a ping, traceroute or BGP lookup from our network, AS6206. Test the real path to your users before you shortlist a site.
Configuration Files: GameUserSettings.ini and Game.ini

There are two main files that are used for the majority of ARK: Survival Ascended server tuning. By identifying the proper file location and function prior to editing, a lot of time can be saved when troubleshooting.
Configuration Files: GameUserSettings.ini and Game.ini
Both sit under ShooterGame/Saved/Config/WindowsServer/ relative to your server installation directory. Create them if they don't exist, the server generates defaults on first launch.
GameUserSettings.ini: General Server Settings Controls
This file controls the primary settings that most administrators access first. The main areas of control are:
- Player count, maximum simultaneous connections.
- PvP servers toggle, a way to switch to PvP or to PvE in current session.
- Crossplay, Crossplay enables PC players and console players to play in the same server and sessions.
- Admin password, Here the server admins can enter a password. In-game players have to enter this password in order to be granted admin rights and be able to use admin commands.
This file is for things that determine the session type or access control. A restart is required for changes to this file, unless you’re using dynamic config (which we’ll cover below).
Game.ini: Advanced Configuration and Rates
The advanced settings in the Game.ini are things like multipliers for harvest and taming rates, for XP gain, for the structure stasis grid, etc. In-depth gameplay tweaks. Also it can read in ini file entries for things like Steam Workshop Mods and cross-platform mod IDs. Each on its own line under the corresponding section heading.
Don’t just make up a number for a multiplier. Test out one change at a time and then verify it in game before you continue to modify it further.
Dynamic config
This is an alternative to config files and can be worth knowing. In ark survival ascended, a URL-hosted config file can be used to push specific setting changes to live servers without needing a full restart, which can be particularly useful for rate-limited events or for extremely fast iteration.
What Is the Difference Between the Game Port and the Query Port?
The game port (default 7777) is where all the actual gameplay traffic goes (player connections, world state, etc., etc. for all entities). The query port (default 27015) is used by the server-browser code in Steam to allow clients to query your server for information and then ping it to connect.
In order to connect to a Firewalls Query Port must be opened, in addition to the port that the server is running on. This also affects the broader network setup of your ark server, including port forwarding, firewall rules and the overall architecture needed to ensure good connection quality for all players.
Port Forwarding and Network Setup for Your Game Server
| Component | Minimum | Recommended |
|---|---|---|
| CPU | 4 cores @ 3.0 GHz | 8+ cores @ 3.5 GHz |
| RAM | 16 GB | 32 GB |
| Storage | 100 GB SSD | 200 GB NVMe |
| Bandwidth | 100 Mbps unmetered | 1 Gbps unmetered |
| OS | Ubuntu 22.04 LTS | Ubuntu 22.04 LTS / Windows Server 2022 |
Architecture Overview
ARK: Survival Ascended runs 1 Unreal Engine 5 process per map. All game clients connect directly to the dedicated server for the map in question using UDP (no relay). As a result, latency (of any kind) is simply equal to the network latency for datacenter locations.
Our dedicated server setup binds to 3 different ports. The main server port (default: UDP 7777) is used for playing the game. The query port (UDP 27015) is used by Steam’s server browser. The RCON port (TCP 27020) is used for the remote admin console to issue live management commands.
Port forwarding is typically required when you’re behind a NAT. Open up all 3 ports on your router or firewall and map them to your internal IP address. If you’re running a bare metal server or a server in a cloud that has a public IP address then you would configure the firewall rules on the OS level firewall and no NAT port forwarding would be required. However, The rules would still need to be opened up.
Quick Setup
- Install SteamCMD and run
app_update 2430930to pull the ASA dedicated server binaries. - Configure GameUserSettings.ini, set
ServerPassword,MaxPlayers, and your chosen server port before first launch. - Enable your firewall to allow incoming traffic for UDP port 7777 (for the game), UDP port 27015 (for queries) and TCP port 27020 (for RCON). If you are behind a NAT, make sure to set up port forwarding for the respective ports.
- Launch the server with the
-port,-queryport, and-RCONPortflags explicitly set, never rely on defaults when running multiple instances. - Verify visibility by querying UDP port 27015 from a remote machine. If the player client does not see the server in the browser then query port must be blocked.
Performance Tip
The most common error configuring a dedicated server is to allocate too little RAM. The world streaming in UE5 ARK: Survival Ascended loads much more into memory than its predecessor ARK: Survival Evolved. A server at 14-15 GB RSS will start to page file under load of players. Start with 32 GB of RAM and then decrease as necessary while monitoring RSS under peak loads.
Getting the server online is only half the work. Keeping your ark survival ascended server healthy, with up-to-date mods, saved games safe, and stable uptime, is an ongoing process that makes a big difference between a thriving community server and a server that. Due to one accidental server restart, loses all player progress.
Managing Mods, Save Backups, and Server Running Stability
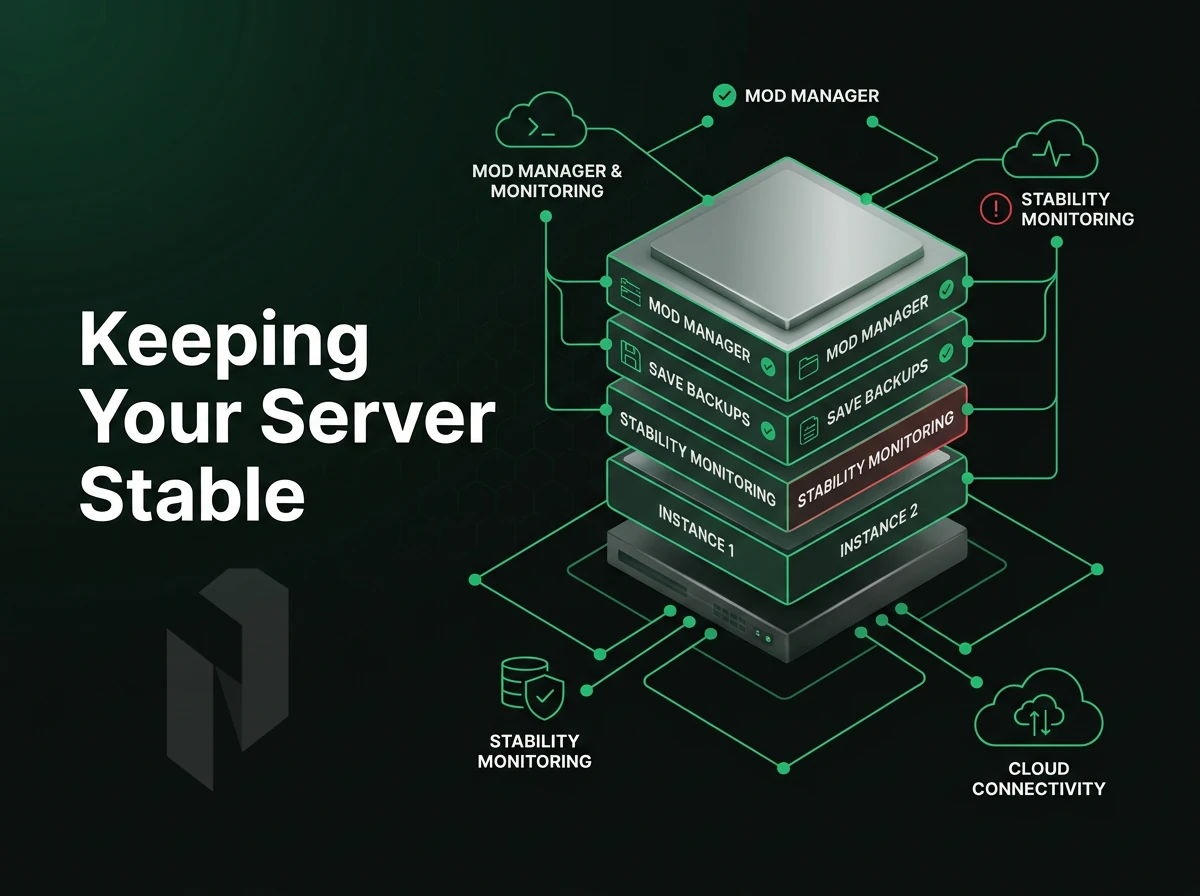
Maintaining a healthy ARK: Survival Ascended dedicated server after launch involves three disciplines: managing mods, protecting world-saves, and monitoring for down time. Lose focus on any one of these and you risk losing player progress or server downtime.
Installing and Maintaining Mods
- Add mods via the server configuration. Open your
GameUserSettings.iniand add each mod's numeric identifier to theActiveMods=line. You can find the correct mod id on the Steam Workshop page for each mod. Steam workshop mods are downloaded automatically on the next server start. - Verify cross-platform compatibility. Note that not all mods work on PC and console clients. On the mod’s Workshop page, verify if it has a cross-platform badge. Incompatible mods can prevent console players from joining your server when you enable them.
- Update mod references after patches. Mod references in game files can get invalidated by game updates. After every ASA patch, check if all your mods are loaded correctly and remove the ones that are causing trouble with the structure stasis grid or spawning errors.
Note: On a Linux host, mod paths are case-sensitive. A mismatched folder name silently skips the mod rather than throwing an error.
Protecting Your Save and Server Files
- Automate world backups. A survival game world is many, many hours of a person’s life. Automate full daily backups plus incremental backups for as long as you have storage space for them. This ensures a crash or corruption can never destroy irreplaceable work.
- Retain off-server backups. Maintain backups on a separate volume or in a remote location. Retain backups for 30 days or more to allow for recovery of corrupted saves from earlier times.
The infrastructure providers handle this for you. The home hardware operator must script and schedule this, and many fail to do it correctly resulting in permanent world loss.
Maintaining Server Stability Through Proper Server Settings
- Continuously monitor the uptime of your servers and use a process monitor or watchdog script to monitor for crashes. Have the script automatically restart the server instance. Home operators manage to restart the server manually. Proactive monitoring by hosted environments means they catch failures before you even know they occurred.
- Apply updates as soon as they are released for the games you are playing. After each game patch verify that your firewall’s inbound and outbound rules for the appropriate ports have been updated. After each update perform a clean startup of the game from the Steam client rather than forcing the game to close while in the middle of a save.
Do You Need a Separate Steam Account to Run an ASA Dedicated Server?
No. The ASA dedicated server binary is a free standalone tool distributed through SteamCMD. You don’t need a second Steam account or additional game licenses. Any Steam account can download and run the ASA server files, even if you don’t own ASA on that account.
Having operational discipline is not enough. The underlying infrastructure has to be able to keep up. The decision on where and how to host will determine the ceiling for all the other decisions.
Self-Hosted vs. Bare Metal ARK Survival Ascended Server Infrastructure
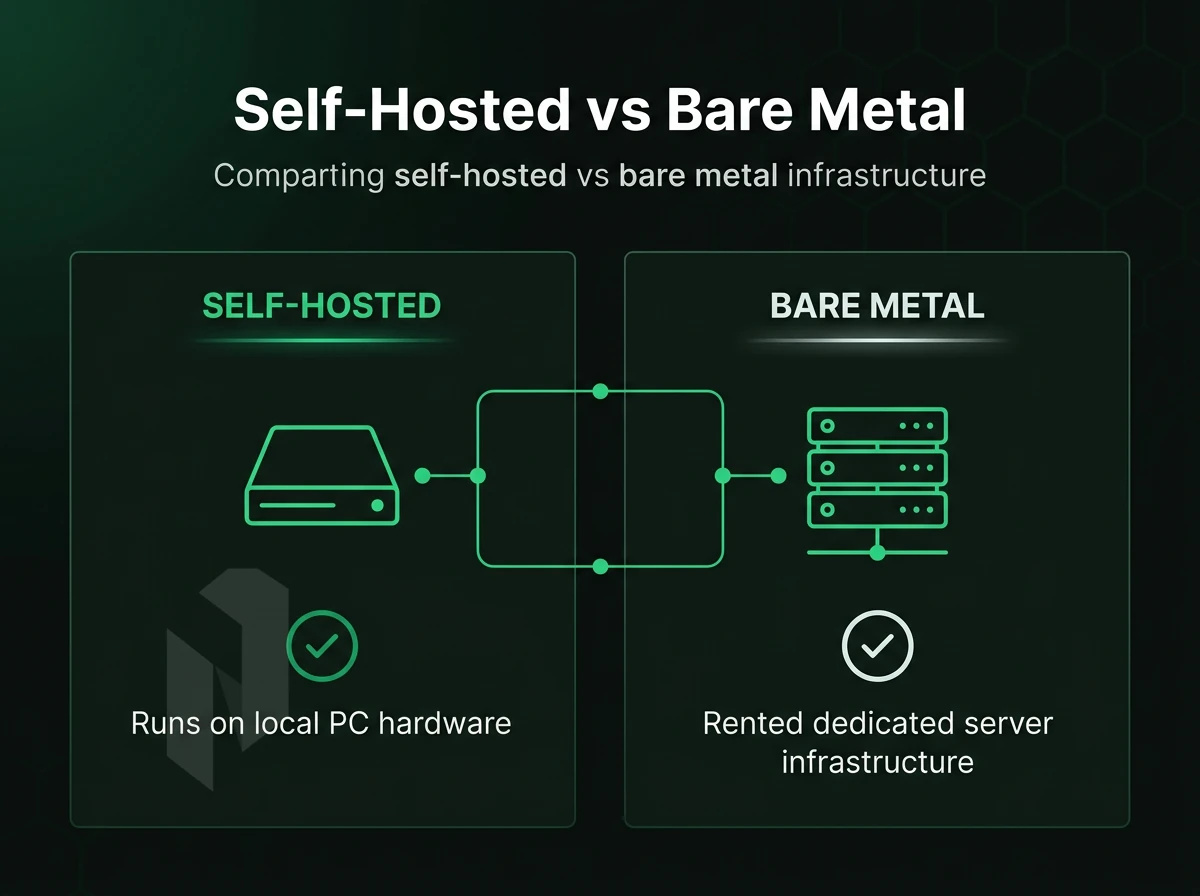
There are essentially two ways to set up an ARK: Survival Ascended server for infrastructure: self-hosted on local hardware, or rented dedicated bare metal. The former is generally better suited for very small servers, the latter for larger ones.
Home Hardware vs. Dedicated Infrastructure
One way to run a small private server for friends is to set up a ASA powered game server on a spare PC you have lying about. The up front cost of the hardware is paid for, the server is easy to set up and you have full access to the machine.
However the limits of such a setup are quickly reached. First the upload speed of your home ISP connection is usually much lower than the download speed. Next, ten players are all that most residential uplinks can handle before things start to slow down. Finally, latency will increase during peak hours and your server will go down whenever the router reboots.
We offer bare metal dedicated servers. Unmetered 10 Gbps servers are hosted in a dedicated environment and run 24/7, unaffected by other household activity. Netrouting deploys servers in less than 60 minutes.
How Much RAM and CPU Headroom Do You Actually Need
Unreal Engine 5’s base version for ASA is memory-intensive. A single standard map would need 16 GB RAM or more while under heavy load. The memory required by the many mods that exist for an ark server will quickly add up, with heavily modded versions needing 24-32 GB of RAM or more.
To allow server owners to run many maps on one server (a so-called cluster), 64 GB RAM or even more would be required to avoid the server’s RAM being swapped out. Causing very slow performance and even lower frame rates for all players connected to that server.
A dual-socket EPYC or Xeon system with 64-128 GB RAM is a minimum practical configuration for a multi-map setup that supports active modding.
DDoS Exposure and Uptime
DDoS protection for ARK game servers is extremely needed. This is because home connections used for gaming on titles like ark survival ascended usually don't have any kind of layer to mitigate such attacks, meaning a simple volumetric attack can take your IP offline and even impact other devices on your network. Our dedicated infrastructure at Netrouting has always-on L3/L4 DDoS protection enabled on a per-service basis. It absorbs the volumetric attacks before they even reach the server.
For community servers and other unofficial servers which publish public player counts, uptime is their reputation. For dedicated hardware, a 99.9% SLA is the norm; home hosting has no SLA whatsoever.
For a closed group of players self-hosting is an option, but for a public server however bare metal server hosting ark is the only option for serious server hosting at scale. Below we outline how we can fulfill your Server Hosting Ark needs.
Why Netrouting for ARK Survival Ascended Server Hosting
ARK: Survival Ascended is an Unreal Engine 5 game. This means that a survival ascended dedicated server requires a powerful CPU, lots of RAM and fast storage in order to not stutter when under load. Netrouting deploys bare metal dedicated servers on the latest Intel Xeon as well as AMD EPYC processor generations. Therefore, they are able to provide the required amount of raw compute power for your ASA dedicated server instance.
- Hardware built for ASA: Dell and Supermicro chassis with up to 2 TB RAM and hardware RAID. Your survival ascended server handles large player counts, structure stasis grid calculations, and steam workshop mods without resource contention.
- Unmetered 10 Gbps connectivity (up to 40 Gbps): Survival ascended server hosting with active mod traffic and crossplay connections needs real bandwidth. Our network runs at 2.4 Tbps+ with port utilisation consistently below 40%.
- Always-on DDoS protection: Game servers are high-value targets. Every service includes L3/L4 mitigation, no configuration required, no extra fee.
- Global reach for your player base: European locations in Amsterdam, Frankfurt, The Hague, Stockholm, Rotterdam, and Bucharest. North American presence in Miami and New York. Asia-Pacific in Hong Kong and Singapore.
- Rapid deployment + 24/7 support: Bare metal provisioned in under 60 minutes. Server admins get a 24/7 NOC and a one-hour ticket response guarantee, not a next-business-day queue.
Our server infrastructure meets the compliance baselines as outlined by ISO 27001 and SOC 2 while you run your own dedicated server on hardware that will not hold you back on playing ARK: Survival Ascended with your community. We would like to welcome you and discuss the options available to you with our sales team.
Key Takeaways: Running a Successful ASA Dedicated Server
Running a successful ARK Survival Ascended dedicated server comes down to four fundamentals. Start with adequate hardware, enough RAM, CPU headroom, and storage space for your player count and mods. Get your configuration files and startup flags right before launch: server settings in the correct INI file, the right game port, query port, and RCON port all open via port forwarding. A clean batch file makes restarting your survival ascended server fast and consistent.
Beyond initial server setup, discipline keeps an ASA dedicated server healthy. Validate mod IDs before each restart, rotate save backups on a schedule, and monitor your server instance for memory creep after patches. For survival ascended server hosting at scale, a purpose-built infrastructure provider removes the hardware burden entirely, leaving server admins free to focus on the game, not the machine.
Running an ARK Survival Ascended dedicated server gives you full control: custom rules, persistent worlds, and performance tuned to your player count. The hardware requirements are steep, plan for a modern multi-core CPU, generous RAM, and fast NVMe storage before you deploy. Master the GameUserSettings.ini and Game.ini files and you unlock everything from taming multipliers to structure limits, while command-line parameters let you fine-tune launch behavior without touching a config file.
The biggest bottleneck for most ASA servers is raw hardware and network throughput. Consumer-grade machines and shared hosting buckle under the load. Dedicated bare metal eliminates that ceiling. Netrouting provisions bare metal servers in under 60 minutes, with unmetered 10 Gbps connectivity and always-on DDoS protection included, everything an ASA server needs to stay online under heavy player load. Explore Netrouting's dedicated server options and get your world running today.
Host the game close to the players.
Share the player regions, the expected player count and the game. We help you pick the hardware and the location.