Virtualization is not new to business IT. For most IT teams the discussion around virtualization is not if they should virtualize but rather how best to continue to manage their virtual environment on an on going basis and attempt to find the best solution to continue to keep costs down associated with the health of their virtual environment(s). For many organizations it is difficult to quantify the annual costs associated with the licensing and on going maintenance of a product such as VMware versus their needs for stable, secure and scalable virtual environment(s) to operate their business.
Proxmox VE has recently received more attention than before, as a different option to manage virtual machines and workloads on servers. In contrast to the proprietary offers, Proxmox VE is Open Source and therefore suitable for any planning under the typical restrictions of a company (budget, hardware, storage, growth, etc.), while still providing a powerful solution for server management.
This guide walks through migrating from VMware to Proxmox. In this guide you will learn what you need to prepare for the migration process, the most common methods to perform the migration, and what you should test on your workloads before you put them into production on Proxmox. how Netrouting infrastructure can support the migration and help teams run Proxmox with more confidence after the move.
Why Migrate from VMware to Proxmox?

Blog contents
Many businesses are concerned about the costs of VMware virtualization software and are exploring alternative solutions. Although a powerful platform for many large enterprise data centers, recent changes to the VMware licensing model have made the solution too costly for many organizations. Instead, they are searching for more cost-effective and flexible virtualization solutions that are easier to manage and allow for greater budget flexibility and scalability.
One of the alternatives to VMware vSphere we discussed at length is the fully featured open-source solution Proxmox VE. On Proxmox VE users can run virtual machines and containers as well as manage storage, clusters, backups and high availability features from a single platform. According to Hornetsecurity Proxmox VE offers enterprise-style features like for example live migration, Ceph software-defined storage, HA clustering and the Proxmox Backup Server. Proxmox VE is free to download and use and is provided with commercial support for companies.
Cost Savings
Switching from VMware to Proxmox is mainly driven by the costs. After significant changes to the licensing of VMware in the past, many teams are now checking if the costs for their current virtualization software are still acceptable. For some companies the license costs even have increased by a factor of two to five.
Proxmox VE follows a different model. It is an open source virtualization platform with optional paid subscriptions for enterprise repositories and support. For businesses that need to migrate virtual machines while keeping licensing costs more predictable, Proxmox can be a practical VMware alternative.
Open Source Flexibility
As Proxmox VE is based on open source technologies, it supports virtual machines, Linux containers, live migration, built-in clustering, and software-defined storage with Ceph. Unlike a fully proprietary virtualization stack, these features give teams more flexibility when they need to run, move, back up, and scale workloads.
Operate on a day-to-day basis even more effectively: compute resources, storage, networking, clustering and also the appropriate backup solutions are managed from within the Proxmox Virtual Environment. However, server, storage and network design can be tailored to the customer's needs.
Infrastructure Control
Migrating to Proxmox allows an organization to control how they wish to build and run their virtual environment as opposed to workloads being built out based on licensing constraints. Instead, organizations can design and build around storage, network, VM backups and recovery etc. and staff skills.
This control matters during migration. Teams need to plan how workloads will move, how storage and networking will be mapped, and how system settings will be tested after the move. By planning and reviewing these aspects before cutover, the migration is easier to manage and less likely to create avoidable issues.
VMware vs. Proxmox and Netrouting Cloud Compute: Feature Comparison
Before we start a migration, we always compare the different options. Platforms like VMware, Proxmox VE, and Netrouting Cloud Compute can all support a virtualized environment, but there are big differences in price, flexibility, the required infrastructure, and long-term scaling.
The table below gives a simple overview of the main differences. It is not meant to say one option is right for every business. Instead, it helps show where Proxmox VE and Netrouting Cloud ComputeThis solution is more suitable for customers who want more predictable infrastructure costs, flexible deployment options, and a practical path away from VMware-based environments.
| Feature | VMware under Broadcom | Proxmox VE + Netrouting | Comments |
| Licensing Cost | Up to 10x increases, with stories of costs rising to $650K+ for a 3500 core minimum | Proxmox VE offers free open-source use with optional paid support. Available for automated installation on Netrouting Bare Metal Servers. Netrouting Cloud Compute Services provide high-availability cloud resources powered by Proxmox VE on a license-free subscription model for public and private clouds. | The drastic cost increase under Broadcom makes VMware financially untenable for many, highlighting Proxmox VE's value proposition |
| Flexibility | Restrictive licensing model, focusing on large customers | Extremely flexible production with no core minimums. Fully customizable to your exact needs. | Two flexible and scalable solutions for the servers of your company in any size. Different from VMware, where you need to fit into a one-size-fits-all solution, Proxmox VE and Netrouting can be scaled up to your needs. |
| Support for Small MSPs | No longer is focus placed on the smaller MSPs. With no flexibility in licensing, there is no sense for the company to pursue these accounts. | A community driven alternative such as Proxmox VE in combination with MSP-friendly support from Netrouting is suitable for small-scale operation. | The community and customer support available with Proxmox VE and Netrouting stand in stark contrast to VMware's focus under Broadcom |
| Cloud and Infrastructure Services | High dependency on VMware's ecosystem, which can be costly for cloud services. | Netrouting is able to offer highly scalable cloud servers or bare metal servers. We are also able to manage these servers for you by using virtualization software Proxmox VE. | Netrouting in combination with Proxmox VE is a powerful and cost-efficient complete solution to manage and expand your cloud. |
| Migration Path | Migrating existing customers who are running on old licenses to new licenses can be very expensive and time-consuming. | Proxmox VE supports a variety of migration tools and methods to more easily migrate from VMware. | For businesses who need to migrate from VMware, Proxmox VE can offer an alternative platform to migrate to, that can save costs, and reduce the amount of time for which a business is down during the migration. |
| Community and Learning | Limitations on learning opportunities due to cost barriers and restricted access | Proxmox VE has large community resources, forums and documentation to help learn to use it. | Proxmox VE is open source. Proxmox VE promotes an experimental culture and the education of IT professionals to innovate and to develop new skills. |
This review compares VMware to Proxmox VE running on a Netrouting server. The best virtualization platform is determined by several factors, including typical application, typical budget, typical administrator skills, and typical long-term datacenter/server room plans. For a large Enterprise with existing infrastructure already set up for a VMware environment, it makes sense to stick with the familiar and support existing invested time and money. However for organizations looking to manage costs for virtual servers as well as the typical associated infrastructure, Proxmox on Netrouting can be a better choice.
VMware to Proxmox Migration: Step-by-Step Guide
Many users think a VMware to Proxmox migration is only about copying files from the old platform to the new one. In reality, moving production workloads takes more planning than that. You need to understand the current VM configuration, prepare the Proxmox environment, choose the right migration method, and test the result before using it in production.
It is useful to go through the guest OS's, the network settings, the possible downtime for the migration, the storage etc. Also look into the disaster recovery, the security, the monitoring etc. of the complete setup. Also note down the current setup, i.e. the ESXi hosts, the VMs and their required CPU and RAM, the disk sizes of the VMs and where the files of the VMs are stored and the network settings etc. This can then be used to rebuild the VMs or to reconfigure the settings to work properly on Proxmox.
Step 1: Backup and Document the VM
Fully backup the VM(s) you intend to migrate before making any changes. That way, you can fully revert back to previous state if VM fails to boot, requires full re-install due to drivers etc, or simply loses network connection after migration.
For each Virtual Machine (VM) that will be deployed at your site, list and fill in the following information: Number of CPU cores to assign to the VM. Amount of RAM to assign to the VM. VM hardware version. Boot disk(s) for the VM. Additional virtual disks for the VM. The datastore where the VM files will reside. Disk format (raw, thick, thin, etc). The MAC address or addresses for the VM's network adapters. The VLAN(s) that the VM will belong to. The DNS settings to use for the VM. The firmware to emulate for the VM (e.g. BIOS or UEFI). The application(s) that the VM will be supporting. Whether guest tools are installed for the VM's Operating System. Note: For each VM that has more than one disk, list all disks and verify which are required prior to adding a VM in Proxmox. It is also important to verify that all required disks and the correct number of disks are attached in the proper order.
Step 2: Prepare the Environment
Before moving a VM from VMware to Proxmox it is advisable to check both the source (VMware) and target (Proxmox) for the correct setup for the move. On the VMware side check if it is possible to export or copy the VM files. On the Proxmox server check the storage, networking, users and backup for the new VM.
Before migrating a VM that is going to run in a Proxmox cluster, set up the cluster design first. A three-node cluster has a quorum and is far more stable than a 2-node cluster for production. Corosync communication between the cluster nodes needs a very stable network with low latency and as little packet loss as possible. This network should be clearly separated from the rest of the network traffic for the VMs, the storage and the backups.
Step 3: Choose the Migration Method
Determine the best way to migrate a specific workload and understand the constraints that affect that decision such as amount of allowed down time for the specific workload, typical VM size and typical amount of manual labor a team can handle to complete the migration. In general most of the VMs can be moved directly using the Proxmox VMware Import Wizard but some might require OVF export, VMDK conversion, a backup/restore or even a live import. The choice is based on minimizing down time for the specific workload.
The Proxmox VMware Import Wizard allows you to import virtual machines from a VMware ESXi host directly into your Proxmox VE environment. The import wizard can map most of the settings of the original virtual machine to the newly created virtual machine on Proxmox. It's a huge difference compared to starting from scratch when creating a new virtual machine, and some of the storage types even allow import of VMs that are running live on a VMware ESXi host.
Step 4: Export or Convert the VM
After you have chosen a VM for a manual migration, you first have to power off the VM. Afterwards you can export the complete VM as OVF and other formats or you just copy the VMDK files of the source VM. The harddisk of the VMware VM then has to be converted to a format supported by Proxmox (RAW, QCOW2 or QED). After that you add the disk to your Proxmox Server.
If you use VMware OVF Tool, the VM can be exported as an OVF file before it is imported or converted. Check the startup drive, disk size, thin or thick provisioning, file format, target storage, and file system behavior. This is especially important for VMs with more than one virtual disk or workloads coming from vSAN datastores.
Step 5: Import VM to Proxmox
With your VM files (or converted disks) ready you can start to create a new VM in Proxmox. As far as possible, fill in all the original VMware VM settings. These include the number of required CPU cores and the amount of RAM for your VM. This also includes the BIOS or UEFI firmware for your VM as well as the disk controller type and the number of network adapters and their MAC addresses.
After migration, the virtual disk for the respective server needs to be attached to the correct storage device and the boot order checked. Even native import of complete VMs should be inspected for correct settings before they are put into production. This also concerns the order of disks, the number and type of network adapters as well as the boot parameters.
Step 6: Configure and Test
After the VM is migrated to Proxmox and boots up on the first attempt, the migration is still not finished. You can check the following items while it is not yet complete: operating system, drivers, network access, application services, disk performance, backups, monitoring, and user access.
Remove VMware Tools from your Windows VMs when you no longer need them, then install VirtIO drivers for better storage and network performance. Installing the QEMU guest agent allows Proxmox to report guest information and perform cleaner shutdown actions. Please note that Windows might detect the migration as new hardware and require re-activation, so check activation during testing.
For Linux systems, check the interface names after the first boot, as they can change during migration. Also make sure a system tied to a specific interface does not break after the adapter is renamed. Finally, verify the IP address, gateway, DNS, routes, firewall rules, and service startup before promoting the VM to production.
VMware to Proxmox Migration Methods
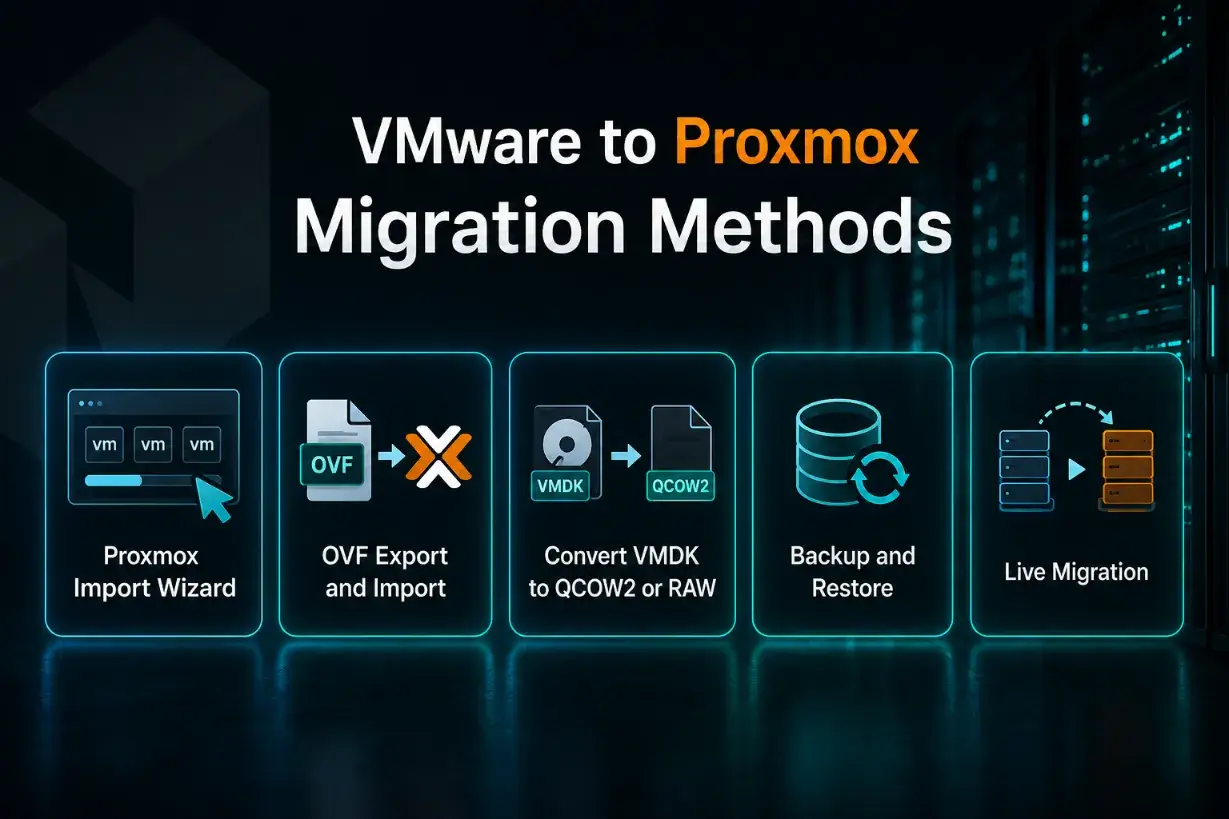
The easier way to import VMs is to use the Proxmox Import Wizard for VMs stored on VMware ESXi hosts. This means there is no need to export an OVF package, rearrange disks, and manually create a VM. The complete migration of a VM to the Proxmox Virtual Environment is done within the web interface or via the API. Proxmox states that version 8.2 provides an integrated VM importer for VMware ESXi, implemented via the storage plugin system.
In this post, ColocationPLUS describes the various methods for a VMware to Proxmox migration and gives a use case for each, for example: manual OVF export for a few VMs, import tools for a large number of VMs, backup and restore for a clean migration in case something fails, and fully automated migration for repeatable tasks.
This method can also support lower downtime planning when combined with careful preparation. For supported environments, live import can allow the VM to start while disk data is still being imported, although production use should still wait until testing is complete.
Proxmox Import Wizard
The Proxmox Import Wizard can be a practical option when you want a more direct way to bring VMware workloads into Proxmox. Instead of handling every export, transfer, and disk conversion manually, the import process reduces some of the manual work involved in moving VMs.
It is possible to import a VM from another platform if both that platform and your current Proxmox version support this feature. Before and especially after the import, double-check the VM configuration for boot mode, disk controller, network adapter, storage target, and guest operating system drivers.
OVF Export and Import
OVF export and import is one of the most common manual migration methods. With this approach, you export the VM from VMware as an OVF or OVA package, move the files to the target platform such as a Proxmox server, and then import or recreate the VM there.
ColocationPLUS lists OVF export with qemu-img conversion as a practical manual method, especially for a small number of virtual machines where administrators want full control over the process.
This method is usually easier to understand because the VM is moved as a package. However, you still need to verify disk format, boot settings, network configuration, and guest drivers before using the migrated VM in production.
Convert VMDK to QCOW2 or RAW
Some of the VMware to Proxmox migrations described here were done by direct conversion of the VM's disk files. VMware uses VMDK files, whereas Proxmox uses QCOW2 or RAW for the disk files.
ColocationPLUS lists qemu-img for typical conversion of VMware VMDK files to Proxmox supported QCOW2 or RAW formats. Please note that even disk metadata will get changed by an inappropriate conversion.
The advantage of this method is that you have more control over the conversion process. After conversion, you create a new VM in Proxmox, attach the converted disk, confirm the boot order, and check whether the operating system needs updated storage or network drivers.
Backup and Restore
This approach can be a clean migration option, especially when you already have a reliable backup of the VM or when the VM comes from an archived or decommissioned virtualization setup. Instead of moving the live VM directly, you restore the workload into Proxmox from a backup or an exported disk image.
ColocationPLUS describes backup and restore as a good option when Proxmox Backup Server is already part of the environment, although disk conversion may still be needed depending on the source backup format.
VM migration using backups is primarily aimed at recovery. To use a backup for migration, the full restore of the backup must be tested first. A backup is only good if the completely restored VMs can be used as if nothing happened to them. This means that the completely restored VM must boot, it must have the appropriate networking, and most importantly, it must be able to run all of the applications that were running on the original VM.
Live Migration
Of the migration methods, live migration is the most sensitive since it is used when downtime needs to be reduced. For a live migration from VMware to Proxmox, it is important to prepare the VM beforehand, sync as much data as possible, and keep the final cutover window short.
When an application is critical to your business and cannot afford to be down for an extended period of time, strive for the lowest amount of downtime possible using techniques such as staged transfers, replication, backup-based synchronization or even specialized tools for migration. Ensure that you have planned your maintenance window, have a rollback plan and fully test the newly migrated VM after cutover.
Typically, the best way to get a team up to speed using a new method like this, is to start with a non-critical VM and work from there to larger and more mission critical workloads.
Before You Migrate: Planning and Preparation
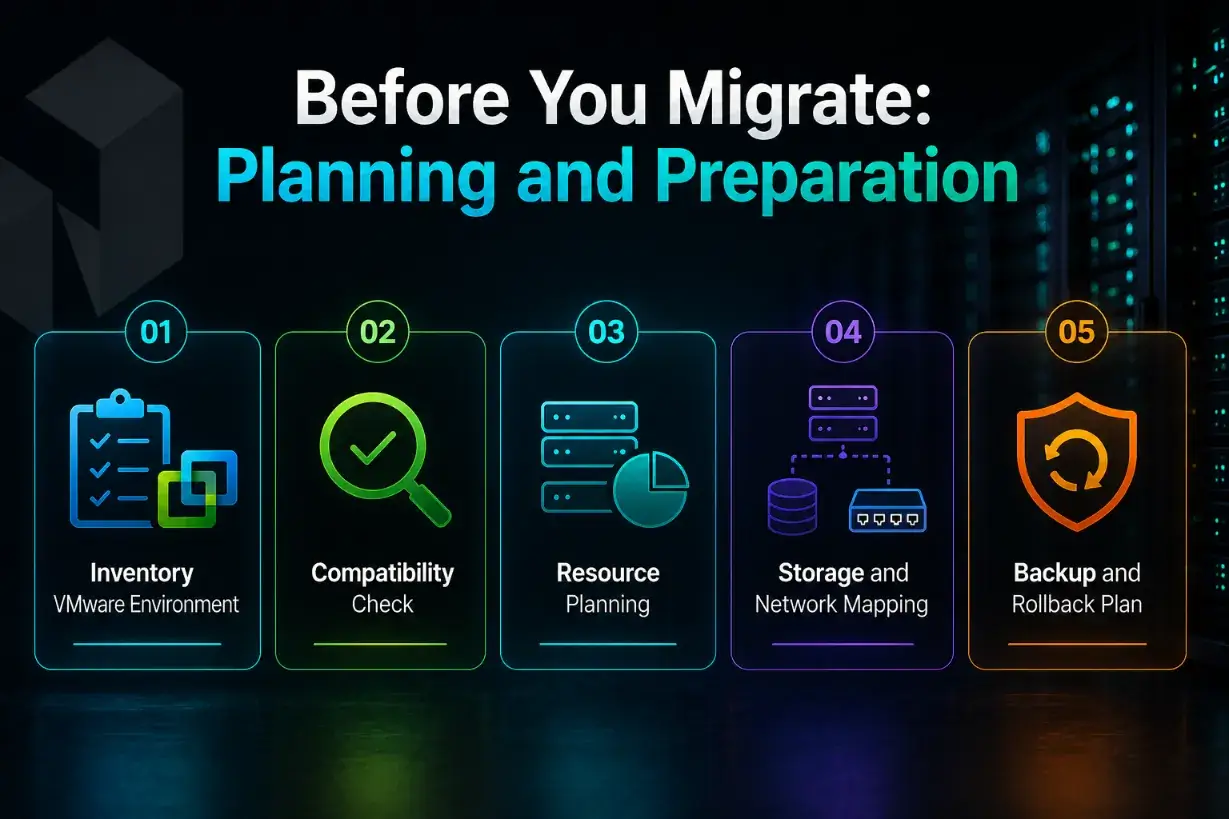
Before you migrate these workloads, take time to plan the environment first. It is not simply a matter of moving some VM files. Each workload can depend on specific storage, network configuration, guest drivers, applications, backups, and downtime requirements.
A good plan helps your team understand what needs to move, what needs to be changed, and what needs to be tested after the migration. It also reduces the chance of problems during cutover, especially for production systems that cannot stay offline for long.
Inventory VMware Environment
Start by documenting your current VMware environment. List the VMs you plan to migrate, their operating systems, CPU and memory allocation, disk sizes, datastore locations, IP addresses, VLANs, and application roles.
This gives you a clear migration map. It also helps you decide which workloads should move first, which ones need more testing, and which old or unused VMs may not need to be migrated at all.
Compatibility Check
Next, check whether each guest operating system can run properly on Proxmox. This is especially important for older Windows systems, legacy Linux distributions, and workloads that rely on specific drivers or VMware Tools.
If a VM depends on VMware-specific components, plan how those components will be removed, replaced, or adjusted after the move. This helps avoid driver, boot, or network issues once the VM starts in Proxmox.
Resource Planning
Review the CPU, memory, disk, and network needs of each VM before migration. This is a good time to check whether each workload is sized correctly, rather than copying every old setting without review.
It can also help to capture baseline performance before the migration. CPU usage, memory usage, disk I/O, and network behavior give your team a reference point when testing the VM after it has moved to Proxmox.
Storage and Network Mapping
Storage and networking need careful attention because they often cause migration issues. Before moving a VM, identify where its disks are stored, whether the environment uses VMFS, NFS, SAN, NAS, or vSAN datastores, and how that setup will translate into Proxmox target storage.
For networking, VMware standard switches or distributed switches must be manually recreated in Proxmox using Linux Bridges or Open vSwitch. Map VMware port groups, VLANs, MAC addresses, static IPs, DNS settings, gateway rules, firewall rules, and any special routing requirements. After migration, network settings may reset or appear under a different adapter name, so each interface should be checked before the VM returns to production.
Backup and Rollback Plan
Before migrating any VM, create a full backup and confirm that it can be restored. A backup is not only a safety measure. It is what gives the team a real fallback option if the VM does not boot, loses network access, or behaves differently after migration.
The rollback plan should also be clear before the migration window starts. Decide when to continue troubleshooting and when to return to the original VMware VM. That decision is much easier when the team has already agreed on the rollback point, downtime limit, and testing criteria.
VMware vs Proxmox: Key Differences
VMware and Proxmox can both support virtualized workloads, but they are built around different operating models. VMware is a long-established commercial virtualization platform with a large enterprise ecosystem. Proxmox VE is an open source virtualization platform built on Linux technologies, with built-in tools for virtual machines, containers, storage, clustering, and backup.
Before you migrate, it helps to understand the practical differences. The goal is not to treat one platform as better for every situation, but to see which one fits your budget, workload, team skills, and infrastructure plans.
| Area | VMware | Proxmox VE |
| Proxmox VE | Commercial licensing and subscription model, with costs that may increase as the environment grows. | Open source platform with optional paid subscriptions for enterprise repositories and support. |
| Performance | Mature enterprise virtualization platform with strong tooling and broad adoption. | Uses KVM virtualization and can deliver strong performance when storage, drivers, and hardware are configured well. |
| Storage | Commonly used with VMFS, vSAN, NFS, SAN, NAS, and VMware storage workflows. | Supports storage options such as ZFS, Ceph, LVM, NFS, and directory based storage. |
| Networking | Uses vSwitches, distributed switches, port groups, VLANs, and VMware managed network policies. | Uses Linux bridges, bonds, VLANs, and firewall rules for network configuration. |
| Backup and HA | Often depends on VMware tools, licensing level, and third-party backup solutions. | Includes clustering and HA options, with native backup tools available for backup and recovery workflows. |
| Best fit | Organizations already invested in the VMware ecosystem or with enterprise processes built around it. | Businesses that want open source flexibility, cost control, and more direct infrastructure management. |
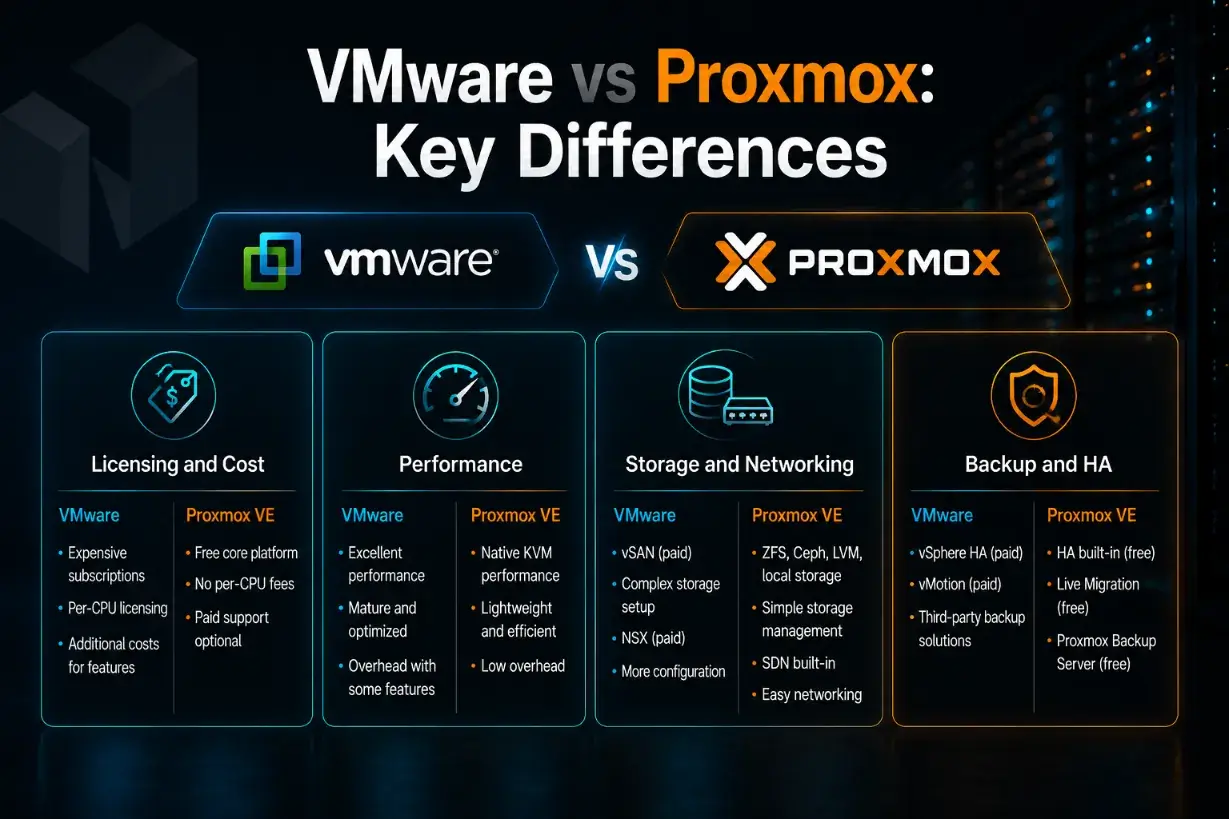
Licensing and Cost
Licensing is one of the biggest differences between VMware and Proxmox. VMware uses a commercial licensing and subscription model, which can affect long-term costs as your environment grows.
Proxmox VE follows an open source model. Businesses can use the platform without the same type of traditional virtualization licensing, while paid subscriptions are available for enterprise repositories and support. This can make Proxmox easier to evaluate for teams that want more flexibility in how they plan virtualization costs.
Performance
Both VMware and Proxmox can deliver strong performance when the environment is configured properly. The final result depends on hardware, storage, networking, workload type, driver support, and how the virtual machines are tuned after migration.
VMware is widely used in enterprise environments and has mature performance management tools. Proxmox uses KVM for virtualization and can run efficiently on modern server hardware. After migration, it is important to compare CPU usage, memory behavior, disk I/O, and network performance against the original VMware environment.
Storage and Networking
Storage and networking should be reviewed carefully before moving from VMware to Proxmox. VMware environments often use VMFS, vSAN datastores, NFS, SAN, NAS, standard switches, distributed switches, port groups, and VLANs.
Proxmox uses a different model. It supports storage options such as ZFS pools, Ceph, LVM, NFS, and directory-based storage. For networking, it commonly uses Linux Bridges, Open vSwitch, bonds, VLANs, and firewall rules. During migration, VMware datastores, port groups, MAC addresses, and VLAN settings need to be mapped correctly into the Proxmox environment.
Backup and HA
Backup and high availability are also handled differently. Many VMware deployments use enterprise backup tools and HA features that may depend on the broader VMware stack and licensing level.
Proxmox includes built-in clustering and high availability features, and it can be paired with native backup options for VM backup and recovery workflows. If high availability is part of the plan, the Proxmox cluster should be designed carefully. Cluster communication needs a reliable, low-latency network, and a three-node setup is usually better for stable quorum than a two-node setup.
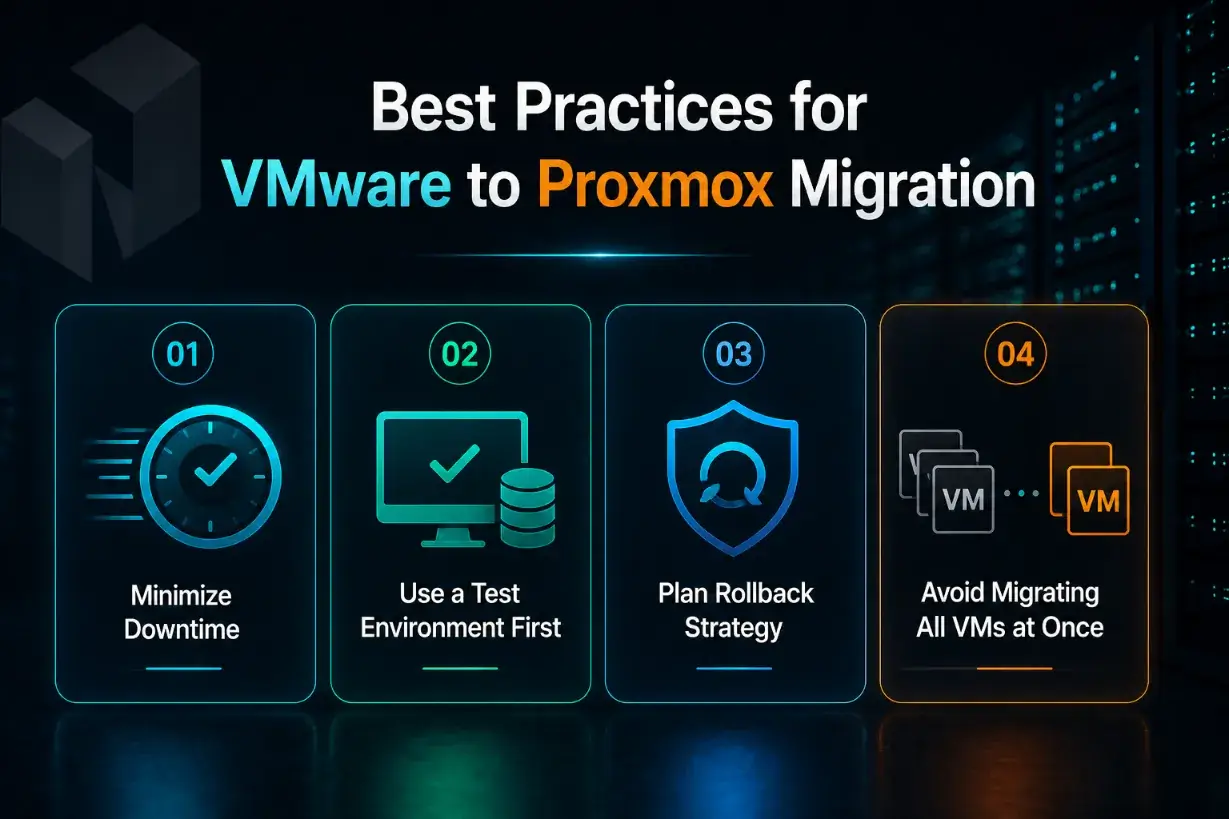
Best Practices for VMware to Proxmox Migration
A VMware to Proxmox migration should be done in a careful and structured way. Even if the technical process looks simple, production workloads can depend on storage paths, network settings, drivers, backups, and applications that may behave differently after the move.
The best approach is to reduce risk before the migration starts. That means planning the downtime, testing the process, keeping a rollback option, and moving workloads in a controlled order instead of rushing everything at once.
Minimize Downtime
Start by deciding how much downtime each VM can safely tolerate. Some workloads may be fine with a short maintenance window, while others may need a more careful cutover plan.
To reduce downtime, prepare as much as possible before the migration window. Document the VM settings, configure the Proxmox environment, prepare storage and networking, and move or convert files in advance where possible. The final cutover should focus only on the tasks that must happen while the VM is offline.
It also helps to schedule migrations during lower traffic periods. For customer-facing applications, internal tools, or business-critical systems, even a short outage should be planned clearly so users and teams know what to expect.
Use a Test Environment First
Before migrating production VMs, test the process with a non-critical workload. This gives your team a safe way to learn how the migration behaves without putting important systems at risk.
A test migration can reveal issues with boot settings, disk controllers, guest drivers, network adapters, IP addresses, or application dependencies. It also helps the team estimate how long each step may take, from export and conversion to import and testing.
After the test, the VM is running in Proxmox, compare it with the original VMware version. Check login access, application behavior, network connection, storage performance, backups, and monitoring. If the test environment works well, you can move forward with more confidence.
Plan Rollback Strategy
A rollback plan should be ready before the migration starts. This is not only for major failures. It is also useful if the VM boots but has driver issues, poor performance, missing network access, or application errors after migration.
Decide the rollback point in advance. For example, the team may choose to return to the original VMware VM if the migrated workload does not pass testing within the maintenance window. This avoids rushed decisions when time is limited.
Keep the original VM unchanged until the Proxmox version has been fully tested and approved. Also make sure backups are complete and restorable. A good rollback plan gives your team a safe path back if the migration does not go as expected.
Avoid Migrating All VMs at Once
Do not migrate every VM in one large move unless there is a strong reason to do so. A phased approach is safer and easier to manage.
Start with lower-risk VMs, then move toward more important workloads after the team understands the process. This makes it easier to identify common issues, improve the migration steps, and reduce the chance of widespread downtime.
It is also helpful to group VMs by application dependency. If a web server depends on a database server or file server, plan those related workloads together. Moving VMs in the right order helps keep services stable and makes post-migration testing more accurate.
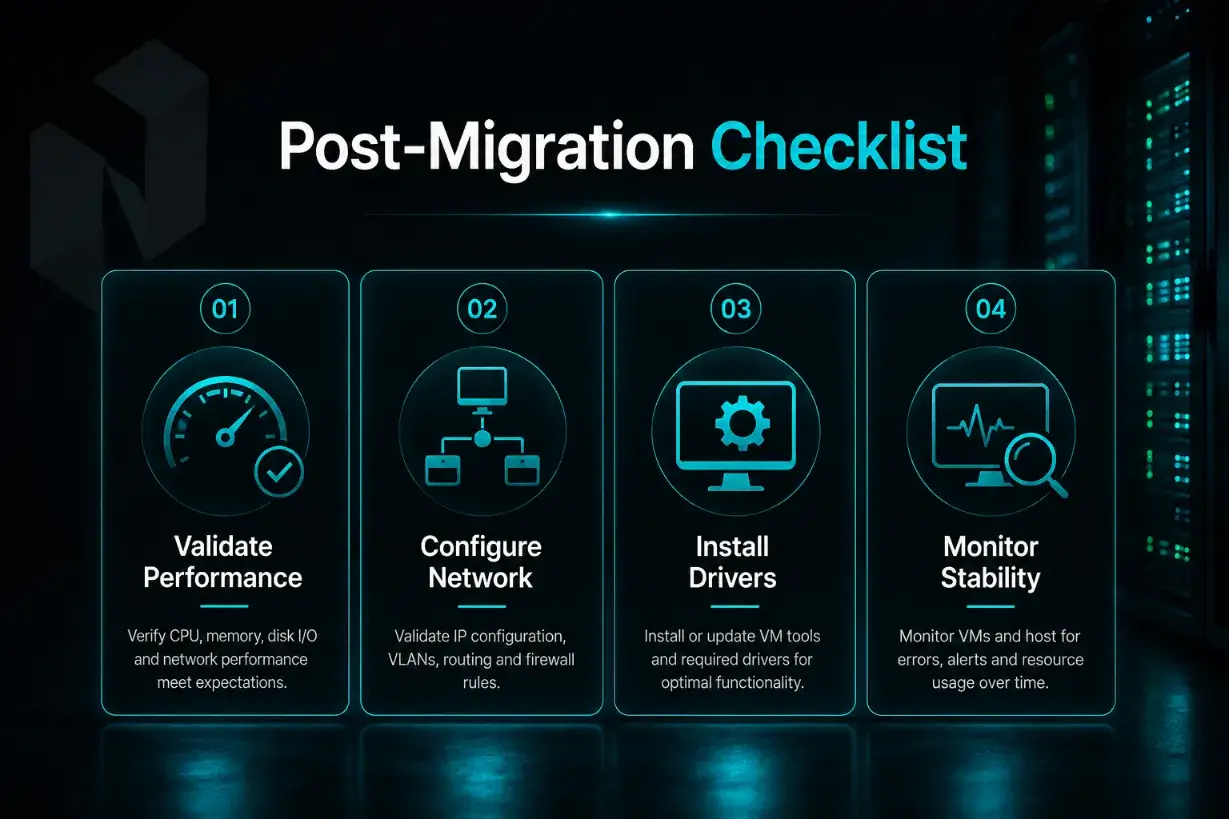
Post-Migration Checklist
After the VM has been moved into Proxmox, the migration is not finished yet. The next step is to confirm that the workload runs correctly, connects to the right services, and performs close to or better than it did in the VMware environment.
This checklist helps your team catch small issues before they turn into bigger problems. It should be completed before the migrated VM is treated as fully production-ready.
Validate Performance
Start by checking the basic performance of the migrated VM. Review CPU usage, memory usage, disk I/O, and network activity. Compare these results with the baseline from the original VMware environment if you captured one before migration.
Also, test the actual application, not only the VM itself. Make sure users can log in, services respond properly, databases connect, and normal business workflows still work as expected. A VM that boots successfully can still have performance or application issues that need attention.
Configure Network
Next, confirm that the network configuration is correct. Check the IP address, gateway, DNS settings, VLAN, firewall rules, and any internal routing requirements.
If the VM uses a static IP, make sure the address is carried over correctly or was reconfigured properly in Proxmox. If the VM has multiple network interfaces, test each connection separately. This is especially important for workloads that separate public traffic, private traffic, storage traffic, or management access.
Install Drivers
Review the guest drivers after the VM is running in Proxmox. For Windows systems, VirtIO drivers may be needed for better storage and network performance. For Linux VMs, check that the system recognizes the disk, network adapter, and any required services correctly.
You should also remove or disable VMware-specific tools if they are no longer needed. Keeping old platform-specific components can sometimes cause driver conflicts, service errors, or unnecessary background processes.
Monitor Stability
Once the VM is configured and tested, monitor it closely for a period of time. Watch system logs, application logs, backup jobs, resource usage, and network behavior.
Look for signs of instability such as high CPU usage, memory pressure, slow disk response, dropped connections, failed services, or backup errors. If the VM stays stable during normal usage, it can be moved into regular operations with more confidence.
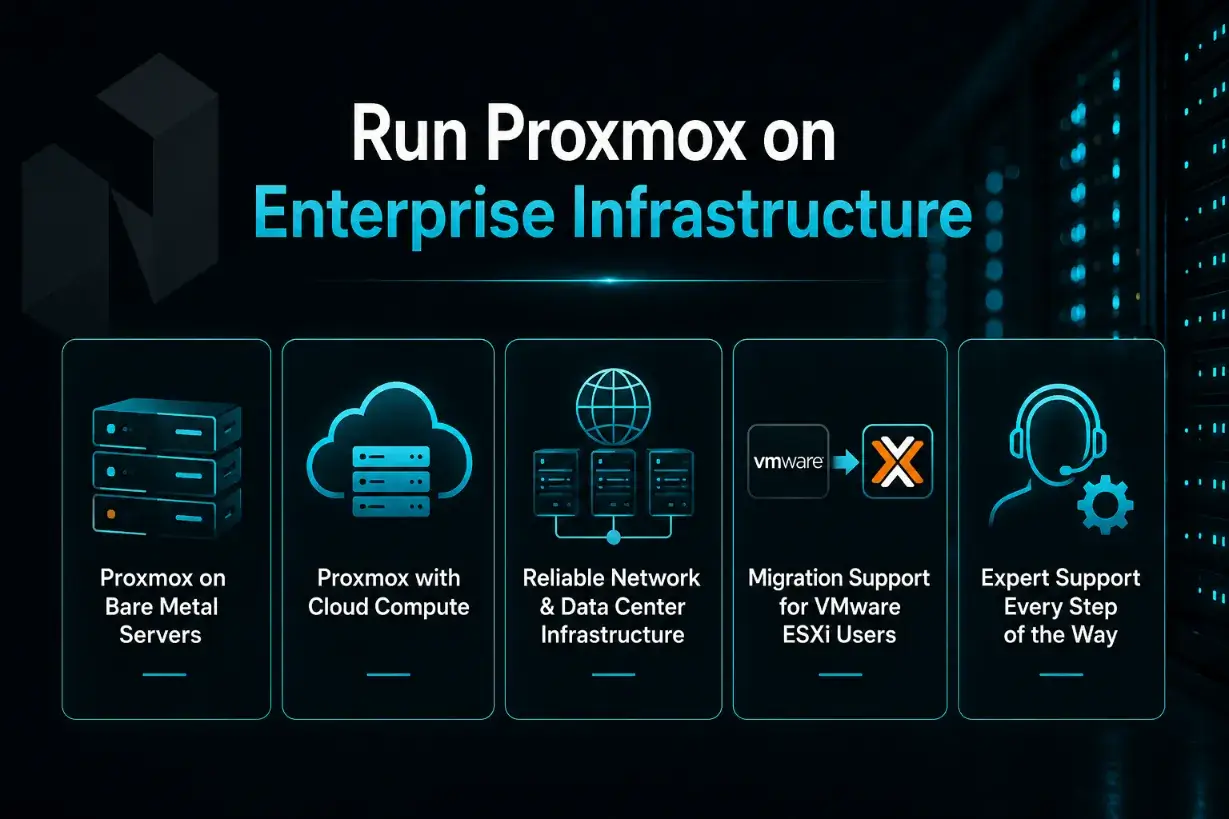
Run Proxmox on Enterprise Infrastructure
A successful Proxmox migration does not depend on the virtualization platform alone. The infrastructure underneath it also matters. Storage, network performance, server resources, backup planning, and support all affect how well the environment performs after the move.
For businesses moving from VMware, the goal is to run Proxmox on infrastructure that is stable, scalable, and practical to manage. That may mean using dedicated bare metal servers, cloud compute resources, or a mix of both, depending on workload needs.
Proxmox on Bare Metal Servers
Bare metal servers can be a strong fit for Proxmox because they give the business direct access to dedicated hardware resources. This is useful for workloads that need predictable CPU, memory, storage, and network performance.
With Proxmox on bare metal, teams can build their own virtualization environment without sharing the underlying server with other customers. This can work well for businesses that want more control over resource allocation, storage design, and VM performance after leaving VMware.
Proxmox with Cloud Compute
Cloud compute can be useful when the business wants more flexibility in how resources are deployed and scaled. Instead of owning or managing every physical server decision directly, teams can use cloud resources to support virtualized workloads in a more adaptable way.
Netrouting’s existing VMware to Proxmox article describes Cloud Compute as a scalable option that can work alongside Proxmox VE for businesses reviewing their cloud infrastructure. It also notes that cloud resources can help teams scale based on demand rather than relying only on fixed server capacity.
Reliable Network and Data Center Infrastructure
A Proxmox environment needs more than enough CPU and memory. It also needs reliable network connectivity, suitable storage, and a data center setup that can support production workloads.
Before choosing where to run Proxmox, review the network design, available bandwidth, storage performance, redundancy options, and support process. These details can affect application uptime, VM performance, backup speed, and recovery planning after migration.
Migration Support for VMware ESXi Users
Some VMware environments are simple enough for an internal team to migrate on its own. Others need more guidance, especially when there are many VMs, older guest operating systems, complex networking, or tight downtime requirements.
Netrouting’s VMware ESXi to Proxmox VE article states that its team offers migration support for VMware ESXi versions 6.5 to 8.0 for customers switching their computing infrastructure to Netrouting Cloud Compute or Netrouting Bare Metal.
This kind of support can be useful when a business wants help planning the move, preparing the environment, or reducing the risk of avoidable migration issues.
Common VMware to Proxmox Migration Issues
This migration can be straightforward, but issues may appear when the source and target environments are configured differently. The most common problems involve VMDK conversion, OVF file import, boot disk order, UEFI mode, storage controllers, guest tools, VirtIO drivers, QEMU guest agent setup, network mapping, and application dependencies.
Networking is one area that needs careful checking. VMware standard or distributed switches must be recreated in Proxmox with Linux Bridges or Open vSwitch, and network interfaces may change names after migration. This can break Linux networking or cause Windows to detect a changed adapter. Check MAC address, VLAN, static IP, DNS, gateway, and firewall rules before returning the VM to production.
Rollback planning also matters. Before cutover, define the maintenance window, testing criteria, and when the team should return to the original VMware VM if the migration does not go as expected. This keeps the process controlled and helps avoid rushed decisions during production migration.
Is Proxmox Right for Your Business?
Proxmox can be a good fit for businesses that want to move away from VMware ESXi while keeping a strong virtualization environment in place. It gives teams a way to run virtual machines with more control over cost, infrastructure design, and future scaling.
For businesses already reviewing VMware alternatives, the decision should come down to practical needs. Look at your current workloads, performance requirements, downtime tolerance, backup process, internal skills, and long-term infrastructure plan. Proxmox may make sense if your team wants a flexible virtualization platform and is ready to prepare the environment properly before migration.
Netrouting’s VMware ESXi to Proxmox VE migration page presents Proxmox as a path for businesses that want to optimize cloud infrastructure, reduce complexity, and move toward a more cost-effective virtualization setup. It also positions Netrouting Cloud Compute and Bare Metal as infrastructure options for organizations planning that transition.
Proxmox may be right for your business if you want:
| Business Need | Why Proxmox May Fit |
| More cost control | Proxmox can help reduce dependence on VMware licensing costs. |
| Flexible infrastructure | It can run on bare metal or cloud compute, depending on the workload. |
| More direct management | Teams can manage VMs, storage, networking, and backups within Proxmox. |
| A VMware alternative | It gives businesses a practical path for moving away from ESXi. |
| Room to scale | It can support changing workloads when paired with suitable infrastructure. |
That said, Proxmox is still an infrastructure decision, not just a software switch. Before moving production systems, businesses should test workloads, review storage and networking, confirm backup plans, and make sure the team understands the new operating model.
For many businesses, the best first step is not a full migration. It is a pilot migration with a lower-risk VM. That gives the team a clearer view of performance, compatibility, and day-to-day management before moving critical workloads.
FAQs
- Why are businesses migrating from VMware to Proxmox?
Many businesses are reviewing Proxmox because VMware licensing costs have changed, with some organizations seeing fees rise by two to five times. Proxmox VE can reduce licensing pressure because it is open source, while still offering optional paid support for teams that need it.
- Can Proxmox replace VMware for business workloads?
Proxmox can replace VMware for many workloads, but it should be tested first. It supports virtual machines, Linux containers, live migration, built-in clustering, VM backup, and software-defined storage with Ceph, which makes it suitable for many business environments.
- What is the Proxmox VMware Import Wizard?
The Proxmox VMware Import Wizard is an integrated tool that helps import VMware ESXi virtual machines into Proxmox VE. It can bring over a full VM and map much of the configuration into Proxmox, which reduces the manual work of rebuilding the VM from scratch.
- Can I use VMware OVF Tool to migrate VMs to Proxmox?
Yes. VMware OVF Tool can export a VM as an OVF template, which includes configuration details and disk references. After export, the OVF file or virtual disk can be imported or converted for Proxmox, depending on the migration method and target storage.
- Do I need to uninstall VMware Tools before migrating?
Yes, it is usually best to uninstall VMware Tools when they are no longer needed. After migration, the VM should use Proxmox-friendly guest tools instead, such as VirtIO drivers for Windows VMs and the QEMU Guest Agent for better VM management.
- Are all guest operating systems compatible with Proxmox?
Not always. Before migration, check whether the guest operating system works properly with Proxmox’s QEMU and KVM drivers. Older Windows or Linux systems may need extra testing because storage drivers, network adapters, or boot settings can behave differently after migration.
- Why do VirtIO SCSI and QEMU Guest Agent matter?
For better performance, migrated disks should often be moved from IDE or SATA to VirtIO SCSI after the correct VirtIO guest drivers are installed. The QEMU Guest Agent helps Proxmox read guest information and perform cleaner shutdown or management actions inside the VM.
- What storage should I use for Proxmox VMs?
Proxmox supports local storage such as ZFS and LVM, as well as shared storage such as Ceph and NFS. For a Proxmox cluster, storage should be planned at the cluster level so VMs can run, migrate, back up, and recover properly.
- Does Proxmox support live migration?
Yes. Proxmox supports live migration when the environment is configured correctly. This can help move running VMs between nodes with less disruption, especially in a Proxmox cluster with proper shared storage and network planning.
- What should I test after migrating a VM to Proxmox?
After migration, test boot order, disk detection, drivers, network access, IP settings, application services, backups, monitoring, and performance. A VM that boots successfully still needs full testing before it is treated as production-ready.