
Single-user mode (called rescue or emergency mode on modern systems) drops your Linux server into a root shell before a single service starts, and, if you want, before anything asks for the root password. You get there from the remote console by editing the boot entry for one boot. Nothing gets written to the boot configuration. When you've lost the root password, it's the fastest fix, and it's also how you repair an /etc/fstab that keeps the system from booting, switch off a service that hangs startup, or run a filesystem check.
When to use it, and when not. For single-user mode, the boot loader still has to load and the kernel still has to start. If you never reach a GRUB menu, or the kernel panics, switch to rescue mode. That boots a separate system over the network and doesn't touch your disks until you mount them. Both methods need the console. Neither needs SSH.
All of the steps below take place in the machine's remote console. Open it before anything else (bare metal: the server's Console button; cloud: the instance's Console button). Then start a reboot from the portal header and keep your eyes on the console as the machine powers on.
Step 1: Get to the boot menu
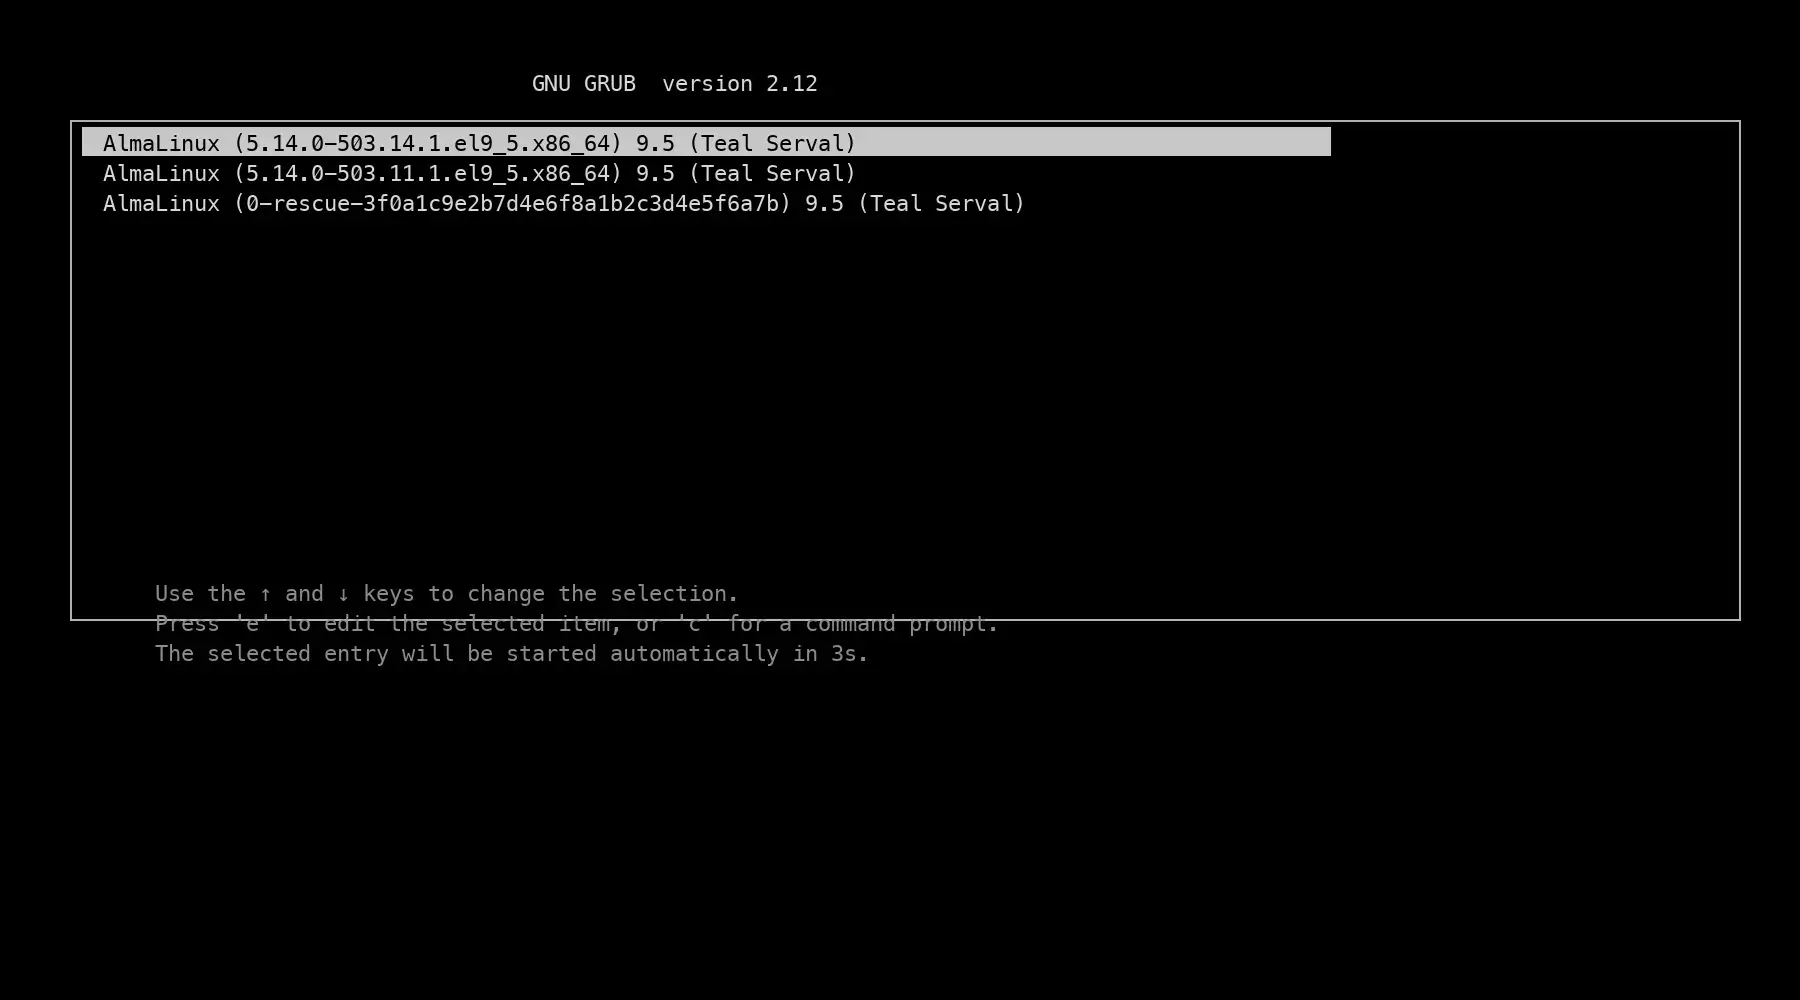
- Cloud instances display the GRUB menu on the serial console for a few seconds. Hit any arrow key while it's up and the countdown stops.
- Bare metal normally keeps the menu hidden. The moment the firmware screen goes away, hold Shift (BIOS boot) or tap Esc repeatedly (UEFI boot). The window is short, so if the system boots straight past it, reboot and try again.
- On Ubuntu, a boot that failed to finish brings up the menu on its own next time. Stock Debian shows it on every boot.
Step 2: Edit the entry for this boot only
Highlight the normal entry and press e. Arrow down to the line beginning with linux (it's long, and it may wrap), move to the very end, and add one option. Press Ctrl+X (or F10) to boot with it. On the next boot, GRUB has already forgotten the change.
| System | Add to the linux line |
What you get |
|---|---|---|
| Ubuntu, Debian | systemd.unit=rescue.target |
A root shell, once you give the root password (if root has one). Filesystems are mounted, the network is down. |
| Ubuntu, Debian (root has no password, or you lost it) | init=/bin/bash |
A root shell, and nothing asks for a password. The root filesystem stays read-only until you remount it (Step 3). |
| AlmaLinux, Rocky, RHEL, CentOS Stream | rd.break |
A shell in the early boot environment, without a password prompt. Your system sits under /sysroot. |
| Any systemd system with disk trouble | systemd.unit=emergency.target |
The barest shell there is: root is mounted read-only and nothing else is mounted. Use it for fstab and fsck jobs. |
Remove quiet and splash from that line too if you'd like to see boot messages. You'll want them when the whole point is finding out where the boot stops.
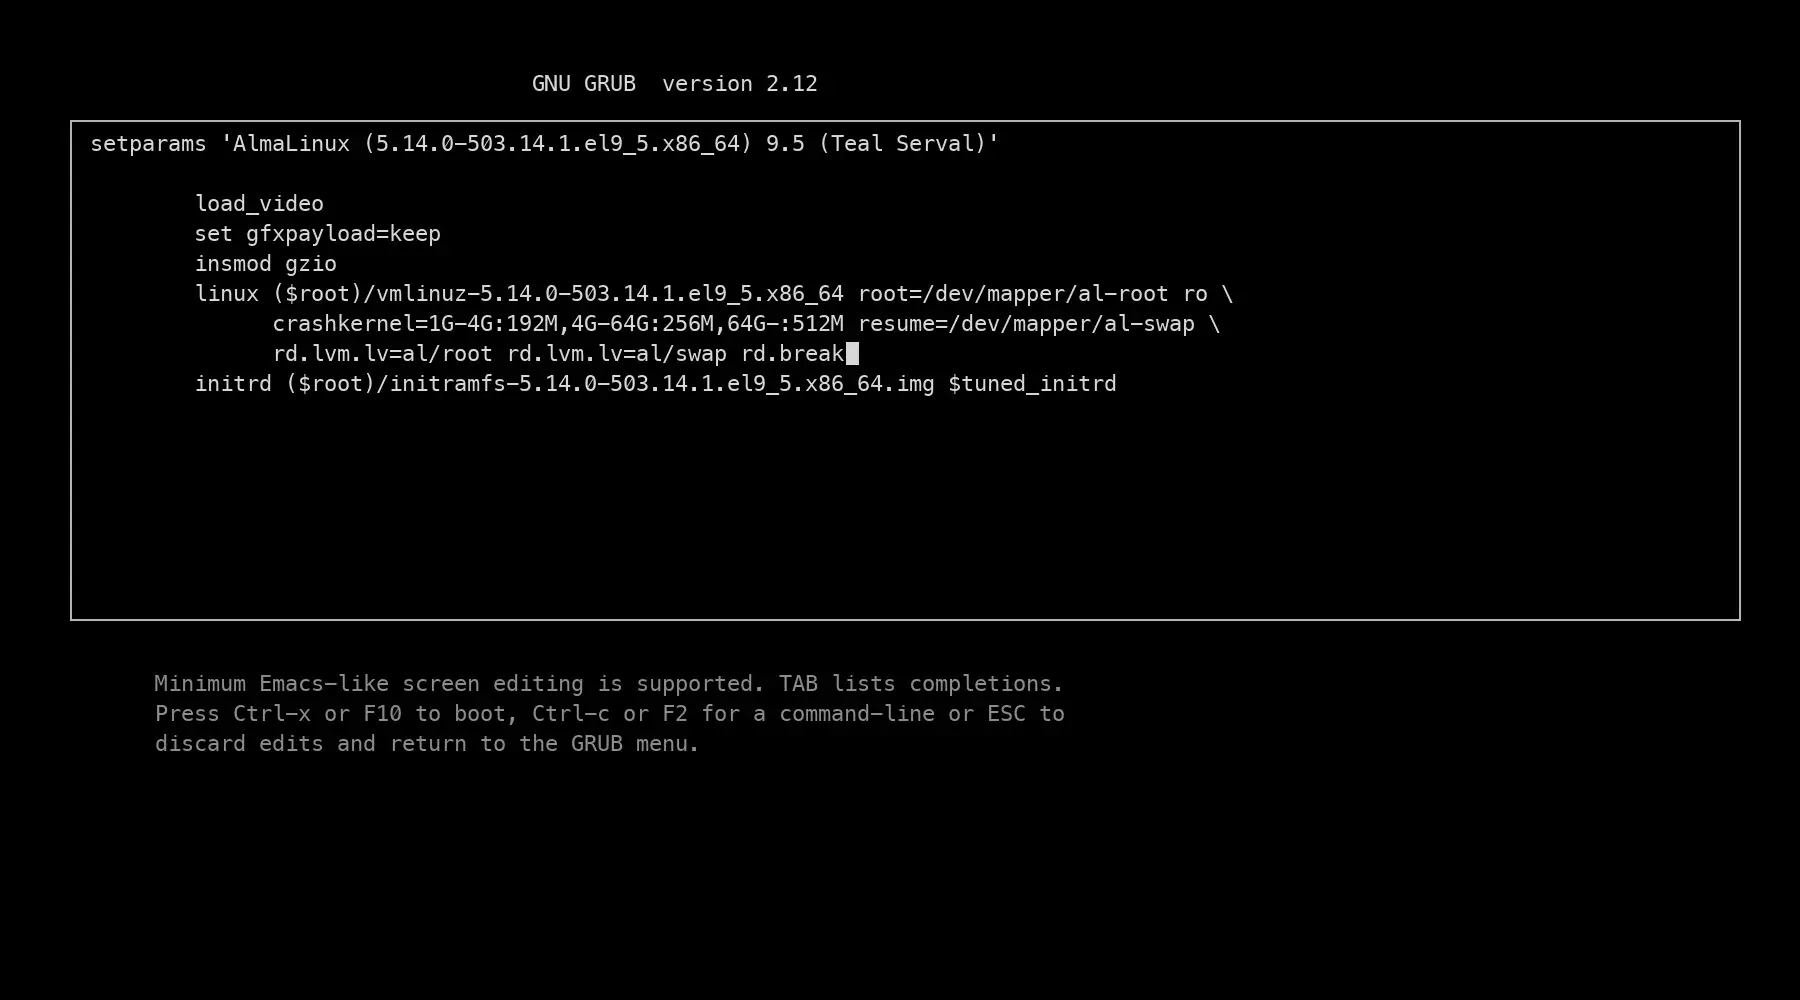
linux line.Step 3: Make the filesystem writable
Unless you booted into rescue.target, the root filesystem is read-only right now. Remount it before you change anything:
# Ubuntu / Debian (rescue.target or init=/bin/bash)
mount -o remount,rw /

# AlmaLinux / Rocky (rd.break) — the system lives under /sysroot
mount -o remount,rw /sysroot
chroot /sysroot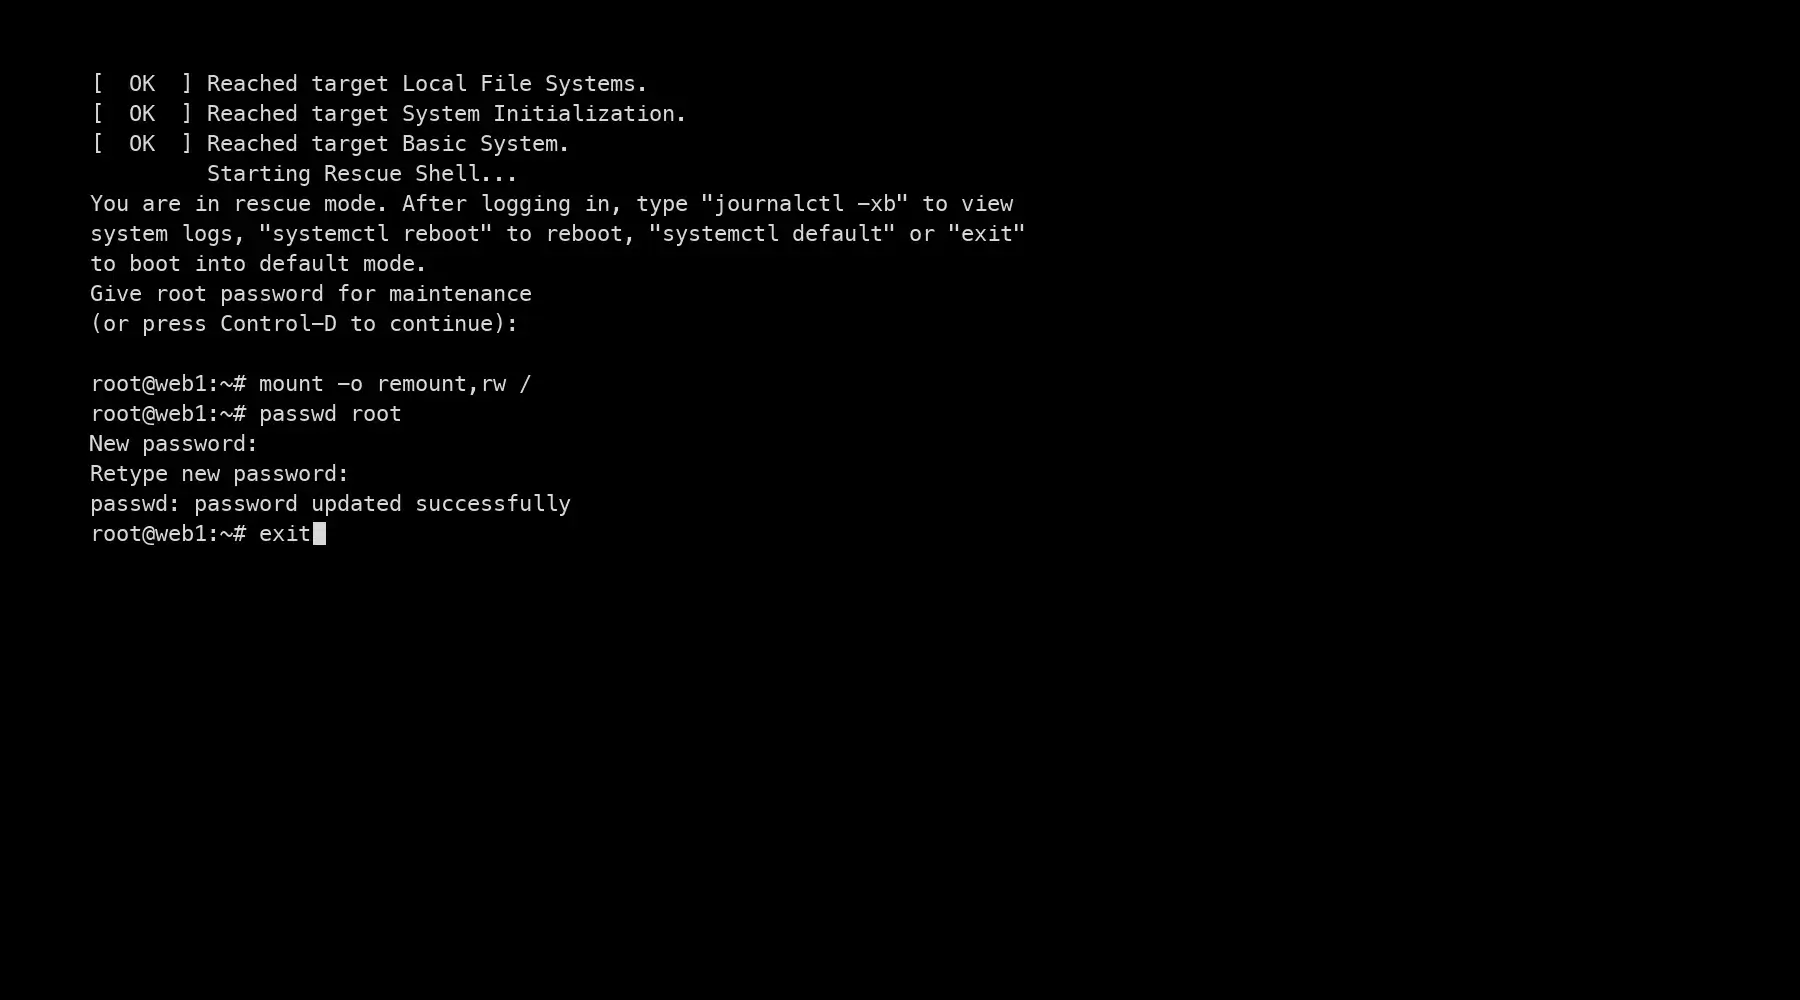
Step 4: Do the repair
Reset the root password:
passwd rootOn AlmaLinux, Rocky and any other SELinux system, run this too before you leave, so the changed file gets its security label back. Without it, the login prompt rejects the new password:
touch /.autorelabelFix a bad /etc/fstab (the usual reason a server lands in “emergency mode”: a disk that was removed or renamed):
nano /etc/fstab      # comment out or correct the offending line
mount -a             # no output means every entry mounts
Stop a service from starting (say, one that hangs at startup or fills the disk):
systemctl disable --now my-service.serviceCheck a filesystem other than root (unmount it first, or work from emergency mode, where nothing else is mounted):
umount /data
fsck -f /dev/sdb1
Regain SSH access after a firewall rule shut you out:
ufw disable                         # Ubuntu
systemctl disable --now firewalld   # AlmaLinux / Rocky
# then fix the rules from a normal login and re-enable
Step 5: Reboot into the normal system
# AlmaLinux / Rocky: leave the chroot first
exit
# then, on every system:
exit          # or: reboot -f
Exiting the shell carries on with the normal boot on most systems. If yours doesn't, run reboot -f or press Reboot in the portal header. Your GRUB edit is already gone, so the next boot is an ordinary one.
Windows: the equivalent
There's no single-user mode on Windows. What comes closest is Safe Mode plus the Windows Recovery Environment. In the console, interrupt the boot twice in a row (power off at the Windows logo), and on the third boot Windows opens the recovery environment: Troubleshoot → Advanced options leads to Startup Settings (Safe Mode), Command Prompt and Startup Repair. A lost Administrator password can only be reset from there using a recovery image. If the account is locked out, see Windows account locked. For a lost password on a cloud instance, the portal's password reset gets you there directly.
Troubleshooting
- I never see the GRUB menu. Bare metal hides it, and you get a second or two. Open the console before you reboot from the portal, then hold Shift from the instant the firmware screen clears. If the menu still won't appear, use rescue mode.
- Rescue mode asks for a password I do not have. Reboot and go with
init=/bin/bash(Ubuntu, Debian) orrd.break(AlmaLinux, Rocky) instead. Neither one asks. - “Read-only file system” when I run passwd. Step 3 was skipped. Remount read-write, then run passwd again.
- The new password is refused after reboot (AlmaLinux, Rocky). The SELinux relabel didn't happen. Boot into
rd.breakonce more, runtouch /sysroot/.autorelabeland reboot. The relabel runs one time and takes a few minutes. - The keyboard does nothing in the console. Click inside the console window before typing. If your browser grabs the shortcut, send Ctrl+X with the console's virtual keyboard.
- The GRUB edit screen shows a different layout. Cloud images and some distributions have a short
linuxline followed by aninitrdline. The option still belongs at the end of thelinuxline, added before you press Ctrl+X.
Still stuck?
Open a support ticket, select the machine, and tell us what's on the console. When the boot loader itself is broken, rescue mode comes next, and we can talk you through it.