
Rescue mode is for the day a server won't boot and you still need its disks. The machine reboots into a small Linux that lives entirely in memory and comes down over the network, so your installed system isn't touched at all: every disk is still there, nothing is mounted until you mount it. From that shell you can run fsck, put a boot loader back, repair a broken fstab, reset a root password nobody wrote down, or copy your data off before you give up on the install.
Before you click anything, check one thing. If the GRUB menu still appears on the console, you probably don't need rescue mode. Single-user mode gets you a root shell on the installed system with no second OS in the picture, and that covers a lost root password, a bad fstab, or a service wedging the boot. Rescue mode is the bigger hammer; keep it for when the small one doesn't reach.
It also costs two reboots, one in and one out, and everything the server was doing stops while you work. If the machine still boots and SSH still answers, fix it in place. It's faster, and nothing goes down.
Cloud instances are a different story. A VM has no rescue button; you attach a rescue image and boot from that. We'll write that up separately once the portal supports it.
Method 1: In the portal
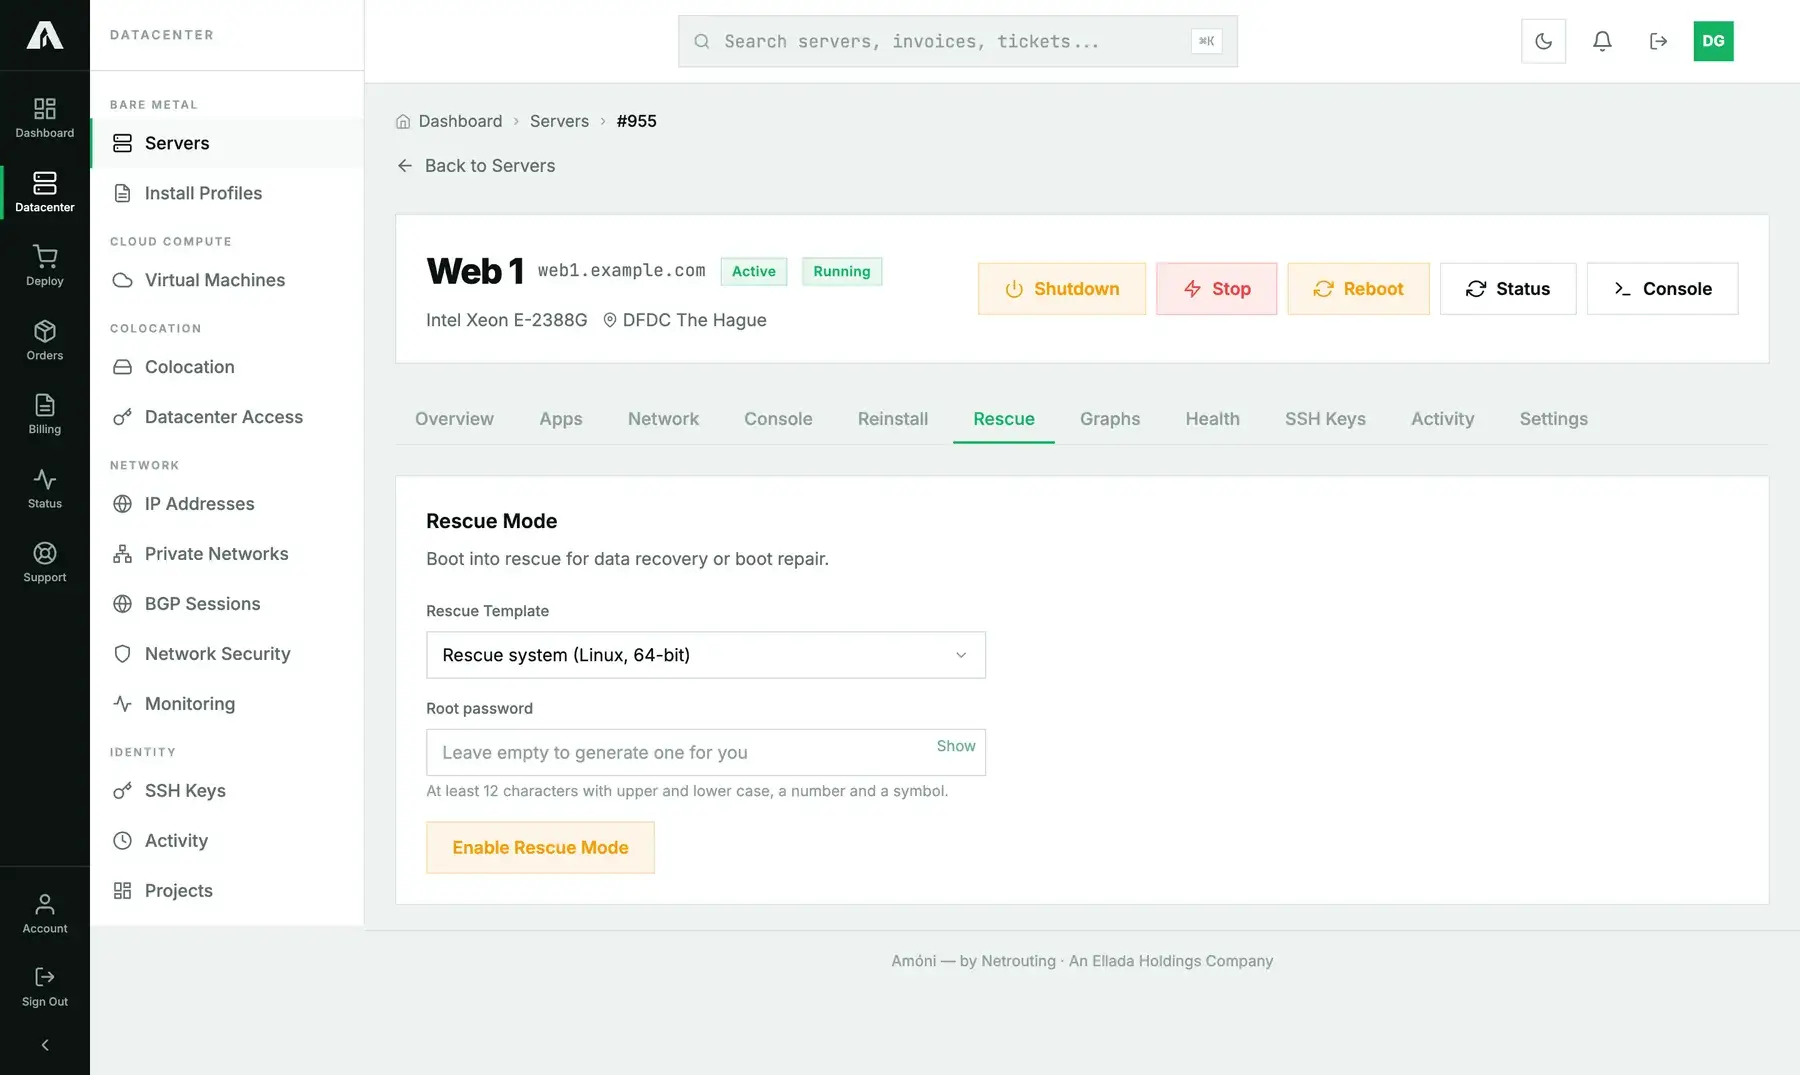
- Sign in at amoni.app, head to Servers, open the server and click its Rescue tab.
- Rescue Template: leave the default Linux rescue system unless you have a reason not to; it handles nearly everything. On machines where it applies, a Windows recovery environment also appears in the list.
- Root password: leave it blank and we'll generate one for you. Prefer your own? It needs at least 12 characters with upper and lower case, a digit and a symbol.
- Click Enable Rescue Mode.
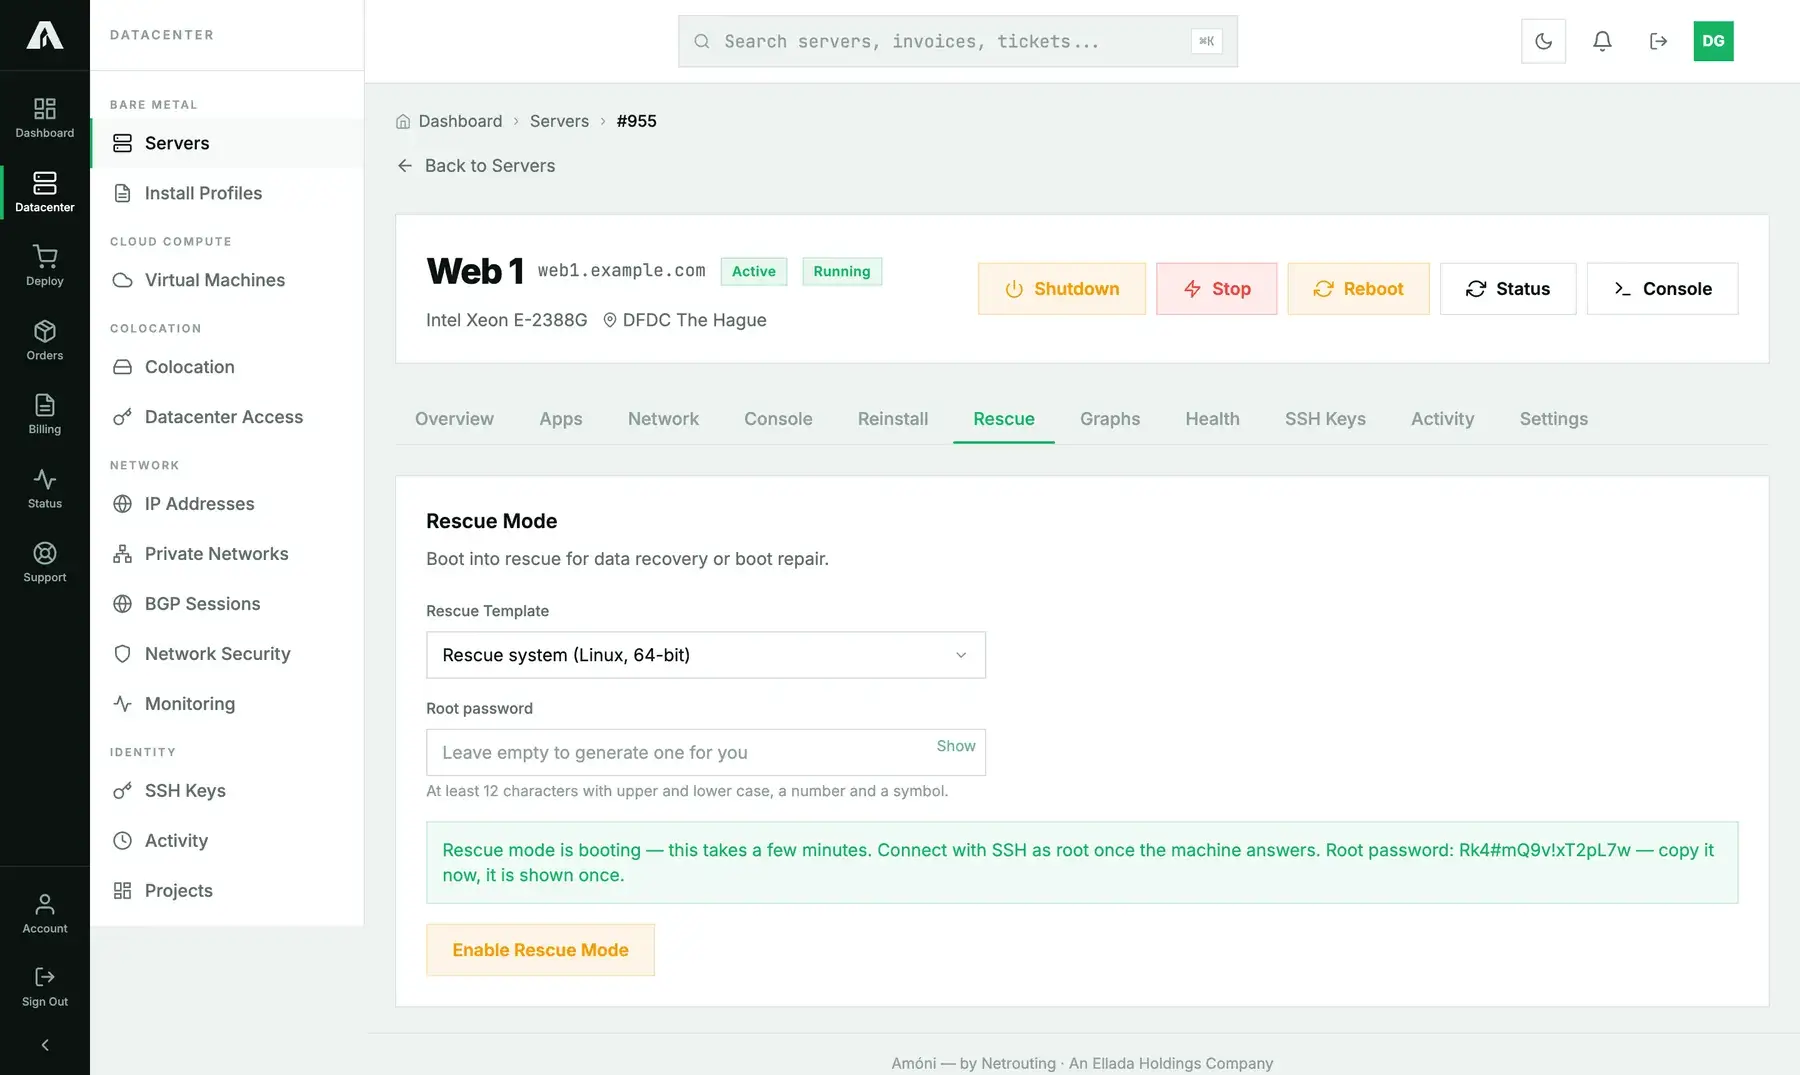
- A green banner confirms the boot is on its way. If we generated the password, it's shown in that banner exactly once. Copy it before you do anything else, because there is no way to look it up afterward.
- Give it two to five minutes, then SSH to the server's primary IP as
rootwith that password. If you'd rather watch the boot than wait blind, the remote console shows it happening.
Getting back out is just a reboot. Press Reboot in the header when you're done. The rescue system was a one-off network boot, so the next start comes straight from the installed disk. People go looking for a stop button at this point. There isn't one, and there's nothing for it to stop: once rescue is running, the boot that started it is already over.
Method 2: With the API
You'll need an API key with the Servers scope (servers.write). The full reference lives at api.amoni.app/v1/docs.
1. List the rescue templates, but only if you want something other than the default. They're the utility entries in the server's profiles:
curl -s https://api.amoni.app/v1/servers/955/profiles \
  -H "Authorization: Bearer nr_live_..." | jq '.data.utility'
[ { "id": 90, "name": "Rescue system (Linux, 64-bit)" } ]2. Boot into rescue. Both fields are optional. Skip profile_id and you get the default template; skip password and we generate one.
curl -s -X POST https://api.amoni.app/v1/servers/955/rescue \
  -H "Authorization: Bearer nr_live_..." \
  -H "Content-Type: application/json" \
  -d '{"profile_id": 90}'
{
"success": true,
"data": {
"message": "Rescue mode is booting — this takes a few minutes.",
"generated": true,
"password": "Rk4#mQ9v!xT2pL7w"
}
}That password exists in this response and nowhere else. We don't keep a copy. Save it first, then carry on.
3. Wait for SSH. The call returns the moment the boot is queued, but the rescue system itself needs a few more minutes to actually come up:
until nc -z -w 3 203.0.113.10 22; do sleep 10; done
ssh root@203.0.113.10
4. Done? Power cycle to leave rescue mode:
curl -s -X POST https://api.amoni.app/v1/servers/955/power \
  -H "Authorization: Bearer nr_live_..." \
  -H "Content-Type: application/json" \
  -d '{"action": "powercycle"}'
There is also POST /v1/servers/955/rescue/stop, and it does less than its name promises. It cancels a rescue boot that's been requested but hasn't happened yet. Nothing more. Once the rescue system is actually up, it answers 409 with code: no_active_rescue, and the power cycle above is the way back.
What the API will tell you
| Status | Meaning |
|---|---|
| 200 | Rescue boot queued. password is present whenever generated is true. |
| 401 / 403 | A bad key, a key missing servers.write, or a managed-infrastructure server where rescue is switched off. |
| 404 | No such server on your account. Body: {"success": false, "error": "Not found"}. |
| 409 | no_active_rescue from /rescue/stop: the rescue system already booted, so reboot instead. |
| 422 | Rescue isn't available for this server, the template id isn't one it offers, or the password doesn't meet the rules. |
| 500 | The installer platform didn't answer: “The action could not be completed right now. Please try again shortly or contact support.” Retry once, then open a ticket. |
Inside the rescue system: the common repairs
The rescue system is an ordinary Linux with the tools you'd expect: fdisk, lsblk, fsck, mdadm, lvm, mount, chroot, rsync. When you log in, none of your disks are mounted yet, so the first job is finding them:
lsblk -fCheck and repair a filesystem. It's unmounted here, which is the one time fsck is safe to run:
fsck -f /dev/sda2Get a shell inside the installed system when you need to edit fstab, reinstall the boot loader or change a password. Mount the root filesystem first, then the pieces the installed system expects to find underneath it. On software RAID the root is /dev/md0; on LVM it's /dev/mapper/<vg>-root. Adjust the first line to match yours.
mount /dev/sda2 /mnt
mount /dev/sda1 /mnt/boot            # if /boot is separate
mount --bind /dev  /mnt/dev
mount --bind /proc /mnt/proc
mount --bind /sys  /mnt/sys
chroot /mnt /bin/bash
You're now inside the installed system, near enough. A few things people do from here:
passwd root                          # reset a lost root password
nano /etc/fstab                      # fix a bad mount entry
grub-install /dev/sda && update-grub  # reinstall the boot loader (Debian/Ubuntu)
exit
Copy data off a system you've decided to rebuild:
mount -o ro /dev/sda2 /mnt
rsync -a /mnt/var/www/ user@backup.example.com:/backup/web1/
Unmount before you reboot (umount -R /mnt). A dirty unmount quietly undoes the check you just ran. Then reboot from the portal, or just type reboot.
Troubleshooting
- SSH still lands on the old system, or times out, after enabling rescue. Give the boot a few minutes. Past five, open the remote console; a machine that skipped the network boot is obvious there, and a Reboot from the header usually catches it on the second try.
- SSH complains about the host key. Expected. The rescue system has a key of its own. Run
ssh-keygen -R 203.0.113.10and connect again. You'll get the same complaint one more time when the installed system comes back. - I lost the generated password. So have we, honestly; it isn't stored anywhere. Reboot the server and enable rescue mode again for a fresh one.
- “Rescue mode is not available for this server.” That machine isn't wired to the automated installer. Open a ticket and we'll boot it into rescue by hand.
- The server keeps coming up in rescue. It shouldn't; the rescue boot is meant to fire once. Open a ticket with the time and we'll clear the boot flag.
- I need Windows recovery. Pick the Windows recovery template if your server offers it. If it doesn't, the route is the remote console with a Windows installation image through management interface access.
Still stuck?
Open a support ticket from the portal, pick the server in the “related server” field, and tell us what the console shows and what you've already tried. If the goal is getting data back, say so in the first line. We'd much rather advise before anything gets written to disk.